WireGuard Configuration Examples#
The following are provided as example WireGuard implementations. Refer to the general WireGuard help page for more guidance on individual field settings. Note: The following examples use sample addressing scenarios; actual implementations should be configured with addresses/settings appropriate to the the particular environments.
Example: Creating a VPN Tunnel between Two VergeOS Systems#
For this example, "SystemA" and "SystemB" will be used to denote the 2 VergeOS systems to be connected via VPN.
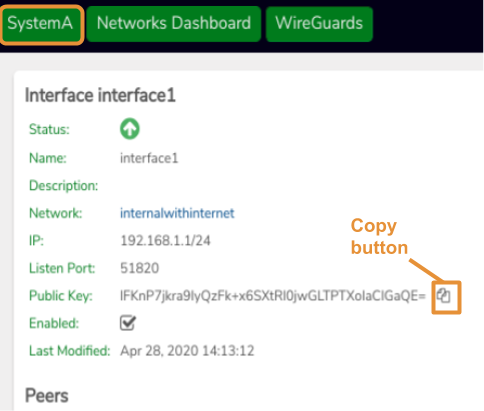
On SystemA:#
- Create a WireGuard Interface.
- Copy the generated Public key (for the Interface) to the clipboard, using the copy icon.
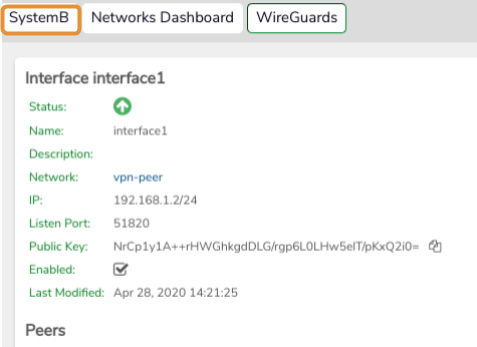
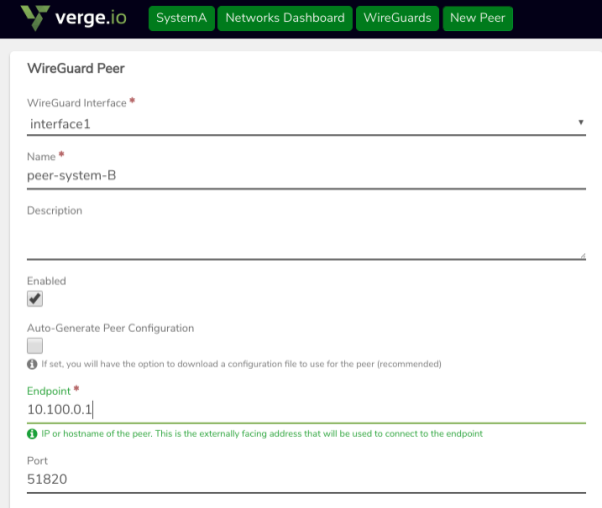
On SystemB:#
-
Create a WireGuard Interface.
-
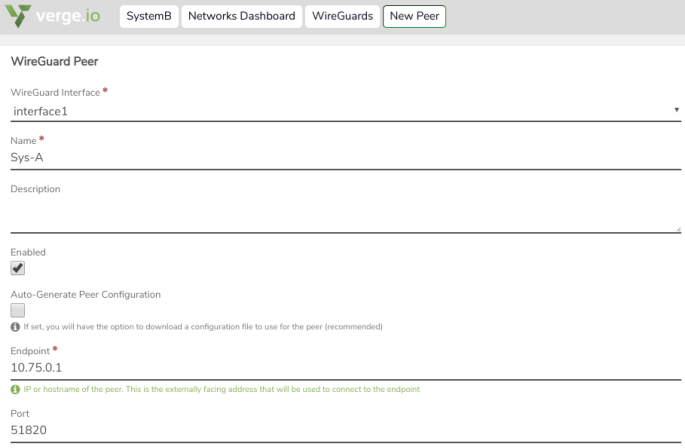
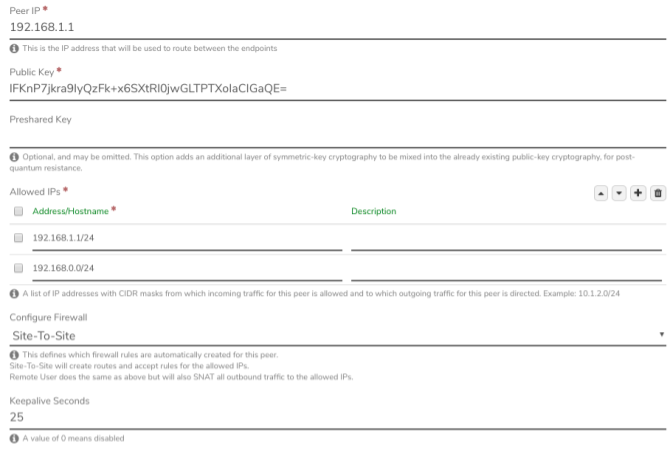
Create a Peer definition (to allow SystemA to connect to this system.)
- In the Public key field, paste in the key already copied from SystemA.
- In the Allowed IPs section:
- add an entry for the address of the WireGuard interface on SystemA.
- add an entry for the connected network on SystemA (e.g. the network to which WireGuard is connected.
-
While still on SystemB, copy the generated public key, using the copy icon.
On SystemA:#
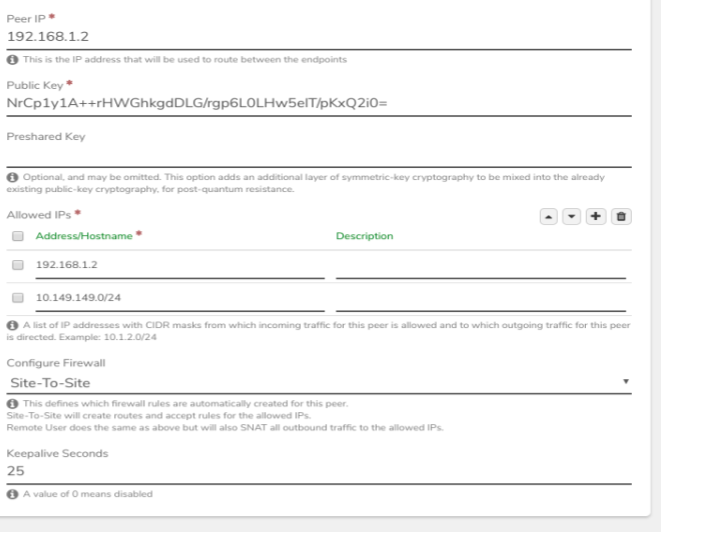
- Create a new Peer definition (for SystemB to connect here.)
- In the Public key field, paste in the key copied from SystemB.
- In the Allowed IPs section:
- add an entry for the address of the WireGuard interface on SystemB.
- add an entry for the connected network on SystemB (e.g. the network to which WireGuard is connected.)
On SystemA and SystemB:#
- Apply Rules (on the networks where Wireguard interfaces were created) to put system-generated network rules into effect.
Testing the site-to-site VPN Connection#
A simple ping test can be done using the Diagnostics tool on each system as an initial test of the connection.
-
On SystemA: navigate to the Network Dashboard (the network to which WireGuard is attached)
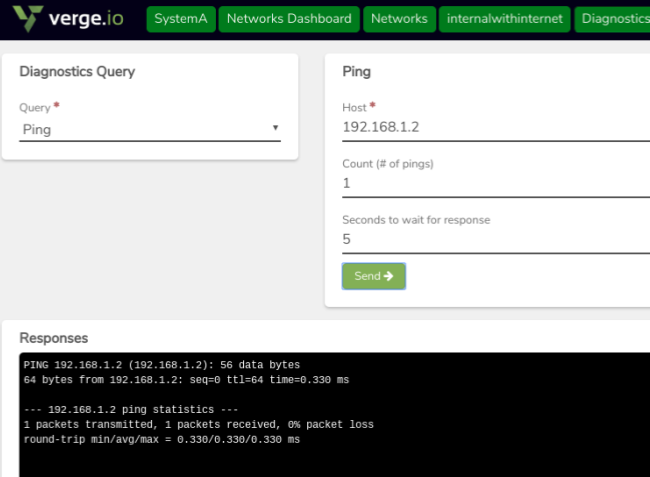
- Select ping from the Query list dropdown. - Ping the interface address on SystemB(from our example: 192.68.1.2) - Similarly, other IP addresses from SystemB (e.g. VMs on the attached Network ) can also be ping-tested here. - Perform the same tests from SystemB to ping addresses on SystemA
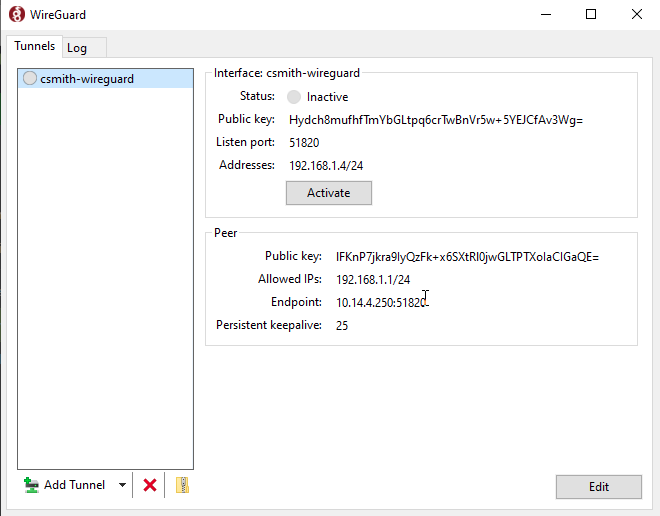
Example: Configuring for Remote Access - Windows Client#
This example covers setup for a single, remote access peer (a Windows client), and presumes a WireGuard Interface has already been created on the server side (the VergeOS system).
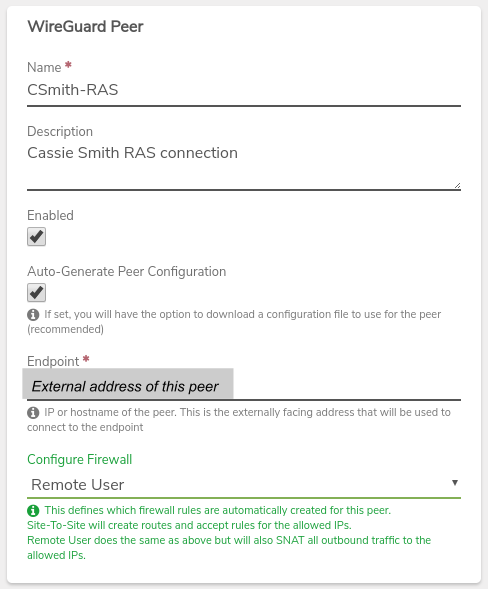
Create New Peer:#
- On the VergeOS system, navigate to the WireGuard(VPN) dashboard.
- Click New Peer on the left menu.
- Select the appropriate WireGuard Interface from the dropdown list.
- Assign a Name to the peer, such as the remote user's name.
- Optionally, a Description can be entered to store additional information about this peer.
- Check the Auto-Generate Peer Configuration checkbox to automate settings and create a configuration file that can be used on the client.
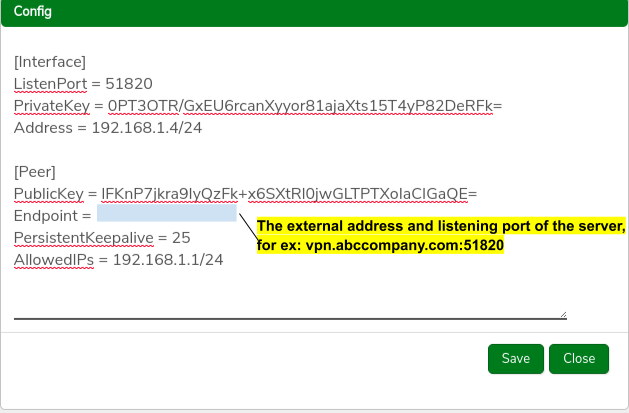
- Enter the Endpoint for the Peer (the external-facing IP address, hostname, or URL this system will use to communicate with the peer.)
- In the Configure Firewall dropdown, select Remote User
- Click Submit to save the new peer entry.
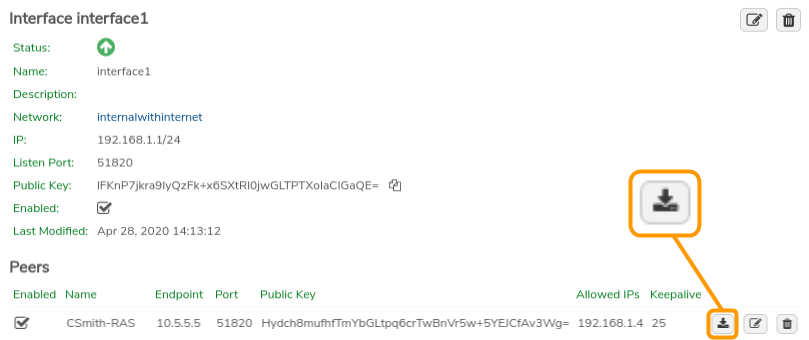
Download the Configuration File:#
- Click the Download Config button on the peer record and select a location for the file; download to a location that will be accessible to the client computer or from which can otherwise be transferred to the client.
Install WireGuard Software on Client:#
- WireGuard Client software can be downloaded from: https://wireguard.com/install.
(In this example, we download and install WireGuard for Windows-64bit to use on a Windows 10 Pro machine.)
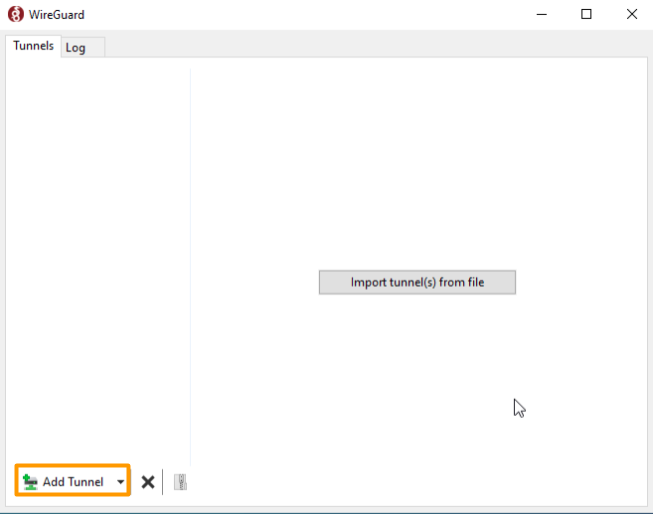
- Click Add Tunnel.
- Navigate to and select the generated configuration file.
- The configuration file is used to automatically create an interface and peer on the client machine. Click the Activate button to open the tunnel, if it was not automatically activated.