IPsec Configuration#
VergeOS includes IPsec compatibility to allow for configuration of a VPN tunnel between a VergeOS network and a third-party IPsec Peer.
Using IPsec
IPsec functionality is provided for situations where there is a specific IPsec requirement. It is recommended to alternately use WireGuard when possible. WireGuard provides better performance than IPsec and because of its simpler configuration, it can be less vulnerable to inadvertent security misconfigurations.
This document provides general step-by-step instructions for configuring VergeOS as an IPsec peer. Specific example configurations are linked at the bottom of this page.
High-Level Steps#
- Create a VPN Network and edit the IPsec Configuration, if necessary
- Create a Phase 1 Configuration
- Create a Phase 2 Configuration
- Configure Firewall and Routing Rules
Create a VPN Network#
- Navigate to Networks > + New VPN.
- Configure Network fields.
- Layer 2 Type: None
- IP Address Type: static
- IP Address: VPN router address
- Network Address: local network range for this peer
- Interface Network:
- --None-- to create a separate VPN network, where connections to other VergeOS networks are all handled with layer 3 routing. (Recommended method)
- Select an existing network to attach the VPN network directly to that network via layer 2.
Information about other network fields can be found at: Internal Networks General Instructions
Edit IPsec Configuration (If necessary)#
General IPsec settings are set to common defaults. These settings can be modified if needed: from the VPN Network Dashboard, click Edit IPsec from the left menu.
Note
Consult your third-party IPsec provider documentation and/or universal documentation resources, such as those provided by NIST, for guidance on individual IPsec settings, potential trade-offs of various selections, and security best practices.
-
Configuration Mode
- normal (default) - this option is typically used and includes common IPsec fields
- advanced - allows for extensive or out-of-the-ordinary IPsec configuration through the use of configuration(conf) files
-
Unique IDs
- Yes (default) - keep particular participant IDs unique. (Also known as the Replace option)
- Never - will ignore INITIAL_CONTACT notify, still not replacing old IKE_SAs
- No - will replace IKE_SAs only upon INITIAL_CONTACT notify.
-
Propose IPComp Compression (default disabled): Utilizes a special protocol designed to compress the payload of IP packets; must be supported by the remote peer. This compression could be beneficial when transmitted data is highly compressible; however, it does introduce computational overhead. Additional firewall rules are typically necessary to handle IPIP traffic.
-
Exclude My Network: This setting should typically be enabled.
-
Cisco Extensions: This setting should remain disabled unless specifically needed to support configuration of the remote IPsec peer.
-
Unencrypted ID and HASH payloads in IKEv1 Main Mode (default=disabled): disabled is recommended because IKEv1 Main mode, where ID and HASH payloads are transmitted unencrypted during initial exchange, introduces several security vulnerabilities.
-
MSS Clamp (default=0/disabled): In some situations, MSS clamping can improve performance in IPsec tunnels. However, it is critical to thoroughly understand your network to calculate and set MSS accurately because an incorrect setting can lead to suboptimal performance and/or packet drops.
-
Strict CRL Policy (default=No): A strict CRL (Certificate Revocation List) policy in IPsec specifies that revoked certificates are not accepted during authentication.
-
Make Before Break (default disabled): new SAs are established while old ones are still active; removing old SAs when the new ones are ready.
Create a Phase 1 Configuration#
- From the VPN Network Dashboard, click IPsec Tunnels > New.
- Enter a Name and optional Description for the phase 1.
- Configure Key Exchange Version
- Auto - uses version that remote peer initiates(IKEv1 or IKEv2)
- IKEv1
- IKEv2
IKEv2 is highly recommended for security purposes.
-
Enter Remote Gateway address: (required) the WAN address at the other IPsec peer.
-
Configure Phase 1 Encryption settings
- Algorithm(default AES)
- Key Length, Hash, and DH Group settings (options will vary depending upon Algorithm selected).
- Lifetime/Units - Auto-expiration setting for SAs (Default: 3 Hours)
Info
Note: Some algorithms do not provide strong security and are therefore not recommended, such as Blowfish, 3DES, CAST128, MD5, SHA1, DH groups 1,2,22,23,24
- Configure Phase 1 Proposal (Authentication) settings
- Pre-Shared Key: can be manually entered or the Generate button can be used to create a random, secure value for a pre-shared key.
-
Negotiation Mode:
- Main - default, recommended mode
- Aggressive - less secure than Main mode but provides more flexibility
-
Identifier: the identity presented to the remote peer during IKE negotiation. When left blank, the current IP is used. Typically, the WAN address of this IPsec peer should be entered because this is the source address identified when accessing the remote peer.
- Peer Identifier: the identity to expect from the remote peer; typically can be left blank to use the address currently specified as the VPN Remote Gateway.
- Configure Phase 1 Advanced Options
-
Connection Behavior defines the behavior to occur at IPsec startup:
- Responder Only - loads connection but does not start it.
- On-Demand - loads a connection and starts it if traffic is detected between the networks
- Start - loads and starts the connection immediately
-
Force UDP Encapsulation (default=disabled) - when enabled, UDP encapsulation is forced even when NAT is not detected.
-
Keying Tries: the number of attempts to negotiate a connection, or a replacement for one, before giving up. The value 0 means to never give up; this setting is only relevant locally, so the other end does not need to have the same setting.
-
Rekey: (default=enabled) option can be disabled/turned off to prevent local initiation of renegotiating a connection about to expire; however, it does not affect renegotiation requests that come from the other peer.
-
Margintime: defines the length of time to elapse before a replacement negotiation for expired keying-channel/connection; this setting is only relevant locally, so the other end does not need to have the same setting.
-
Dead Peer Detection: defines the default action to perform on a timeout:
- Clear - closes the connection
- Hold - monitors for new traffic and renegotiate connection if traffic between the networks is detected.
- Restart (default) - tries to renegotiate connection immediately
- None - disables sending of DPD messages
-
DPD Delay: (default=30 seconds) defines time interval R_U_There messages/INFORMATIONAL exchanges sent to the peer, which are only sent when there is no other traffic.
- DPD Failures: defines the maximum number of failures in which to automatically delete peer connections after inactivity (This setting does not apply to IKEv2.)
Info
If necessary, additional Phase 1 definitions can be added. From the VPN Network Dashboard: IPsec Tunnels > New
Create a Phase 2 Configuration#
Info
A Phase 2 configuration must be created in order to create a working IPsec connection.
- From the VPN Network Dashboard, click IPsec Tunnels on the left menu; double-click the appropriate phase 1 to go to that phase 1 dashboard; click New on the left menu.
- Enter a Name and Optional Description for the new Phase 2 configuration.
- Select a Mode:
- Tunnel (default) - recommended method for site-to-site VPN; two IP headers sent, with original packet encapsulated
- Transport - encrypts only payload and ESP trailer.
- Specify the Local Network: (required) the subnet of IP addresses to include on this side of the VPN e.g. 192.168.0.0/24.
- Specify the Remote Network: the network of the remote peer in CIDR format e.g. 50.x.x.x/28.
- Select a Protocol:
- ESP (recommended)
- AH (Authentication only)
- Specify Lifetime in Units (Seconds, Minutes, Hours, Days, Years) or Forever for duration of the SA established during the Phase 2.
- Select the encryption Algorithm and Key Length, Hash, and DH Group settings.
- Click Submit to save the Phase 2 Configuration.
Configure Firewall and Routing Rules#
Networking configuration will be necessary for IPsec traffic. The following network rules are auto-created for a new VPN Network:
- incoming allow IKE UDP 500
- incoming allow IPsec NAT-Traversal 4500
- incoming allow ESP
- incoming allow AH
Additional network configuration (e.g. firewall rules, routing) will be required dependent upon specific network and IPsec design. See links below to specific IPsec examples that include network rule configuration.
To Initiate the VPN Tunnel from the VergeOS Side#
- From the VPN Network Dashboard, click Power On from the left menu.
- Click the Plug icon under IPsec Connections.
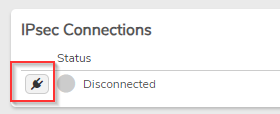
- Watch for the IPsec status to show connected.
IPsec Example Configurations#
Example IPsec configurations are available for reference:
Troubleshooting Tips#
Verify mutual/compatible settings across peers#
IPsec is very sensitive to configuration mismatches. Most settings require precise alignment between peers of the connection. Consult the documentation for your non-VergeOS IPsec peer and ensure all parameters are meticulously matched on both ends.
VPN Network Container Logs#
Network container logs can be accessed from the VPN network dashboard: Diagnostics > Diagnostics Query: Logs These logs often contain helpful troubleshooting information, such as IPsec error messages, source and destination addresses, etc.
Trace Network Traffic#
Tracing the traffic on the VPN network and associated external and internal networks can often assist troubleshooting efforts by identifying if tunnel traffic is reaching a network, identifying source and destination addresses of packets, etc. Diagnostics > Diagnostics Query: TCP Dump. The Network Diagnostics Guide provides a reference for using the Network Diagnostics tool.