Uploading to the vSAN (Media Images)#
The Media Images section allows for uploading files to the VergeOS vSAN allowing *.iso files, drive images, VM definition files, etc. to be easily accessible for creating/installing/importing VMs.
Note
Optionally, files that are uploaded to vSAN media images can be shared via a public link.
To Upload a File from the Local computer#
- From the Main Dashboard, select Media Images.
- Select Upload.
- Click the Choose Files button
- The File Browser Dialog appears. Browse to the desired folder and select the desired file(s). Holding down the ctrl or shift key allows for multi-selection.
- Click the Open button
- Selected Files, along with size and type are displayed.
- Click the Upload button.
- An Upload Progress popup window will appear showing the upload progress. From this window, the upload can be canceled or paused, if needed. When the upload operation is complete, the file(s) will display in green in the Upload Progress popup.
Warning
Reloading the browser window will interfere with the file upload.
To Upload a File from a web link (URL)#
- From the Main Dashboard, select Media Images.
- Select Upload from URL
- Enter a valid URL (for example:
https://fedorapeople.org/groups/virt/virtio-win/direct-downloads/stable-virtio/virtio-win.iso) - Enter desired Name for the file.
- Optionally, a File Description can be entered to provide additional information.
- The Allow insecure SSL links to be used option will permit the file download from a site without a valid CA-signed certificate (e.g. missing, invalid, expired, or self-signed certs).
- Click the Submit button
- The file will appear in the Media Images listing.
To Create a Download Link for a Media Images File#
- From the Main Dashboard, click Media Images on the left menu.
- Click Add Public Link on the left menu.
- Select the desired File in the dropdown list (the list includes all the files in Media Images).
- Select a Link Format
- Anonymous(uuid) - creates a public download link using a GUID(128-bit number)
ex:
https://verge.example.com/273b5d6a--b205-1e1b-6ae6-01cfa7ed1233 - Custom - creates a public download link using the name entered
ex:
https://verge.example.com/customname - Use File Name (recommended) - creates a public download link using the original filename
ex:
https://verge.example.com/virtio-win-1.9.6.iso
- Anonymous(uuid) - creates a public download link using a GUID(128-bit number)
ex:
- Select Expiration Type
- Never Expire (default) to make the download link perpetual. (Public Link can be manually edited or deleted later if needed.)
- Set Date to select a specific date/time to cease the download link.
- Click Submit to save the link.
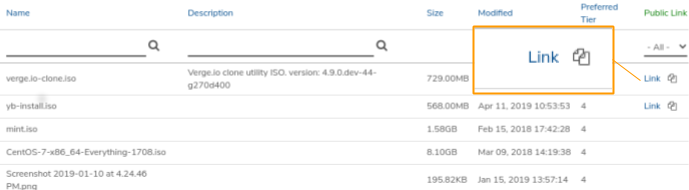
The Media Images list appears. Download options appear on the far right of the given file:
- Click Link to directly download the file from the page.
- Click the copy icon to copy the download address to the clipboard.