IPSec Configuration#
IPSec compatibility is available to provide a VPN tunnel between a VergeOS network and a third-party IPSec Peer.
Notes:
- IPSec functionality is provided for situations where there is an IPSec requirement; because of the inherent complexity of the IPSec protocol, it is recommended to alternately use Wireguard (also supported) when possible as it is generally an easier protocol to work with.
- These instructions focus on the preferred IPSec configuration in which a public IP address is employed for the tunnel. Utilizing a public IP for the VPN is recommended as it will allow for the simplest deployment.
- Consult appropriate third-party IPSec documentation for configuration of the non-VergeIO peer and meticulously match specific settings at both ends.
Basic Steps to Configure VergeOS IPSec VPN:#
- Creating a VPN Network
- Editing IPSec Settings (as needed)
- Editing Phase I (as needed)
- Creating Phase 2
- Configuring Routing and Firewall Rules
Creating a VPN Network#
- From the Cloud Dashboard, click Networks from the left menu.
- Click Networks again from the left menu.
- Click New VPN from the left menu.
--None-- to create a separate VPN network, where connections to other VergeOS networks are all handled with layer 3 routing. (Recommended method)
-OR-
Select an existing network to attach the VPN network directly to that network via layer 2.
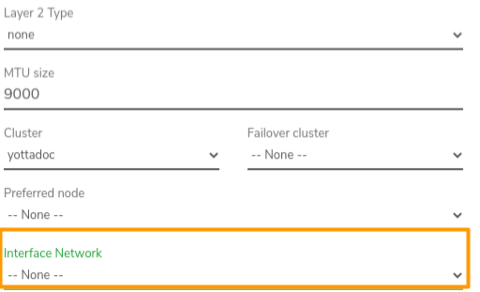
Note: if an existing network is selected for the Interface Network and VPN connectivity is needed to additional VergeOS networks, further routing rules will be needed and additional unnecessary network hops will be introduced; therefore, if the VPN will need to connect to multiple networks and will be utilizing a public IP address (recommended), it is best to select --None-- for interface network and handle connections to all networks via layer 3 routing.
Editing IPSec Configuration#
(if necessary)#
Common general IPSec settings are set by default; these settings can be modified if needed: From the VPN Network Dashboard, click Edit IPSec from the left menu.
Configuration Mode default = normal normal - typically used, includes common IPSec configuration fields advanced - allows for advanced/extensive/out-of-the-ordinary IPSec configuration contained within conf files - contact Verge.io Support for assistance.
Unique IDs - Yes (default) - keep particular participant IDs unique. (Same as Replace option) - Never - will ignore INITIAL_CONTACT notify, still not replacing old IKE_SAs - No - will replace IKE_SAs only upon INITIAL _CONTACT notify.
Propose IPComp Compression (default disabled)
Exclude My Network
Cisco Extensions Unencrypted ID and HASH payloads in IKEv1 Main Mode (default=disabled)
MSS Clamp (default=0/disabled)
Strict CRL Policy (default=No)
Make Before Break (default disabled)
Editing Default Phase 1 Configuration#
(if necessary)#
An initial phase 1 is automatically created (named "phase-I") with default settings; if necessary, these settings can be modified:
From the VPN Network Dashboard, click IPSec Tunnels on the left menu; click to select phase-I in the listing; Click Edit on the left menu.
Key Exchange Version - Auto (uses version that remote peer initiates(IKEv1 or IKEv2) - IKEv1 - IKEv2
Remote Gateway address (required); the WAN address at the other IPSec peer.
Phase 1 (Encryption)#
(Encryption) Algorithm.(default AES)
Key Length, Hash, and DH Group settings (options will vary depending upon Algorithm selected).
Note: Some algorithms do not provide strong security and are therefore not recommended, such as Blowfish, 3DES, CAST128, MD5, SHA1, DH groups 1,2,22,23,24
Auto-expiration setting for SAs: Lifetime/Units. (Default: 3 Hours)
Phase 1 (Authentication)#
Pre-Shared Key - can be manually entered or the Generate button can be used to create a random, secure value for a pre-shared key.
Negotiation Mode
- Main - default, recommended mode
- Aggressive - less secure than Main mode but provides more flexibility
Identifier address (leave blank to use current IP).
Peer Identifier (can be left blank to use the address currently specified as the VPN Remote Gateway).
Advanced Options#
Connection Behavior defines the behavior to occur at IPSec startup:
- Responder Only - loads connection but does not start it.
- On-Demand - loads a connection and starts it if traffic is detected between the networks
- Start - loads and starts the connection immediately
Force UDP Encapsulation (default=disabled) - when enabled, UDP encapsulation is forced even when NAT is not detected.
Keying Tries - the number of attempts to negotiate a connection, or a replacement for one, before giving up. The value 0 means to never give up; this setting is only relevant locally so the other end does not need to have the same setting.
Rekey (default=enabled) - option can be disabled/turned off to prevent local initiation of renegotiating a connection about to expire; however, it does not affect renegotiation requests that come from the other peer.
Margintime - defines the length of time to elapse before a replacement negotiation for expired keying-channel/connection; this setting is only relevant locally so the other end does not need to have the same setting.
Dead Peer Detection - defines the default action to perform on a timeout:
- Clear - closes the connection
- Hold - monitors for new traffic and renegotiate connection if traffic between the networks is detected.
- Restart (default) - tries to renegotiate connection immediately
- None - disables sending of DPD messages
DPD Delay (default=30 seconds) - defines time interval R_U_There messages/INFORMATIONAL exchanges sent to the peer, which are only sent when there is no other traffic.
DPD Failures - defines the maximum number of failures in which to automatically delete peer connections after inactivity (This setting does not apply to IKEv2.)
If necessary, additional Phase I definitions can be added, if needed: From the VPN Network Dashboard, click IPSec Tunnels on the left menu; click New on the left menu.
Creating Phase 2#
A Phase 2 must be created in order to create a working IPSec connection.
- From the VPN Network Dashboard, click IPSec Tunnels on the left menu; double-click the appropriate phase 1 to go to that phase 1 dashboard; click New on the left menu.
- Enter a Name for the new Phase 2 configuration.
- Optionally, enter a Description.
- Select a Mode:
- Tunnel (default) - recommended method for site-to-site VPN; two IP headers sent, with original packet encapsulated
- Transport - encrypts only payload and ESP trailer.
- Specify the Local Network (required) e.g. 192.168.0.0/24.
- Specify the Remote Network as the network of the remote peer in CIDR format e.g. 50.x.x.x/28.
- Select a Protocol:
- ESP (recommended)
- AH (Authentication only)
- Specify Lifetime in Units (Seconds, Minutes, Hours, Days, Years) -OR- select Forever in the Units dropdown list to impose no auto expiration.
- Select the encryption Algorithm.
- Select Key Length, Hash, and DH Group settings (options will vary depending upon Algorithm selected).
- Click Submit to save the Phase 2 Configuration.
Configuring Firewall and Routing Rules#
Networking configuration will be necessary for IPSec traffic. The following network rules are auto-created for a new VPN Network:
- incoming allow IKE UDP 500
- incoming allow IPSec NAT-Traversal 4500
- incoming allow ESP
- incoming allow AH
Additional network configuration (e.g. firewall rules, routing) may be required depending upon specific network and IPSec design. The configuration will be significantly more complex if NAT is involved. Consult Verge.io support if further networking assistance is required.
To Start the VPN Network:#
From the VPN Network Dashboard, click Power On on the left menu.