Replacing a Defective or End-of-life Drive#
This page covers replacing a drive (participating in the vSAN) due to defect or end of lifespan. Expedient replacement of problem drives is crucial to maintaining vSAN data protection.
When Does a Drive Need to be Replaced?#
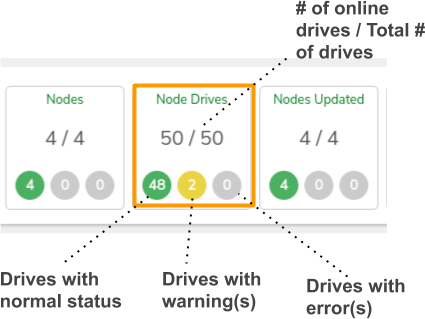
The Verge interface will provide warnings or alerts to indicate when there is a problem with a physical drive. When a drive has a warning or error status, an indicator will "bubble up" to the System dashboard Page (To access the System dashboard: from the main dashboard, select System on the left menu.)
-
Click anywhere within the drive count box to access the full list of drives.
-
Double-click a drive with an error/warning to view its dashboard that displays more detail.

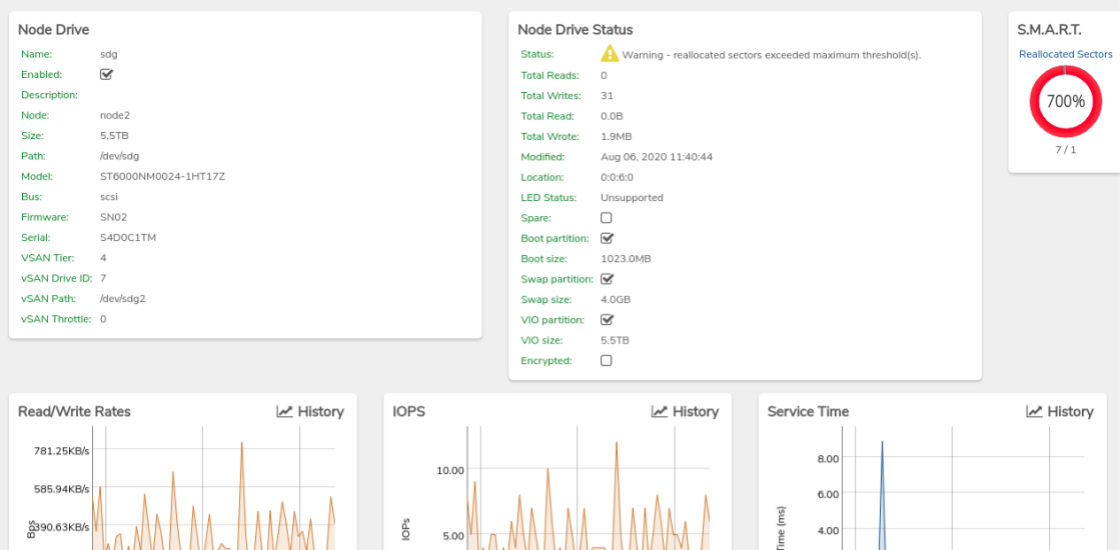
Example Warning/Error Statuses#
- Warning - Wear level exceeded maximum threshold(s)
- Warning - Reallocated sectors exceeded maximum threshold(s)
- Error - Drive is unresponsive; read or write error threshold reached
It is highly recommended to configure on-demand and scheduled subscriptions (with target type=System Dashboard) to ensure timely awareness of drive issues. Go here for information on setting up subscriptions. {.is-warning}
Determining the Correct Physical Drive for Replacement#
- Navigate to the node dashboard.
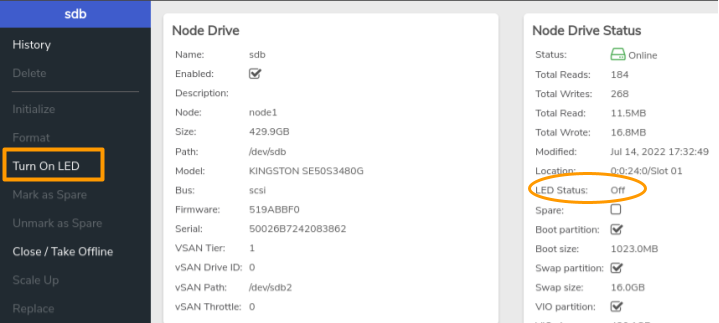
- Activate the drive LED
-
If LED Status indicates Off, click Turn on LED on the left menu.
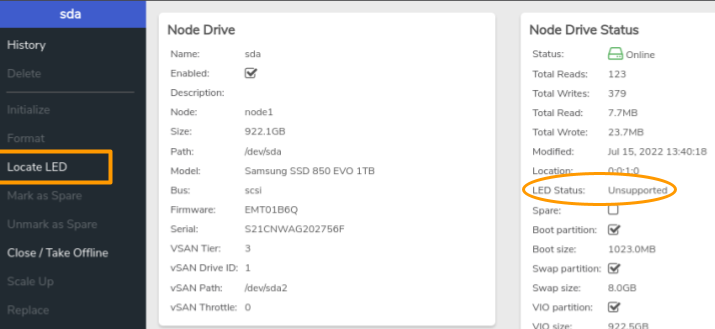
-
If LED Status field indicates Unsupported, click Locate LED on the left menu.
The Diagnostics window will appear with settings pre-filled.
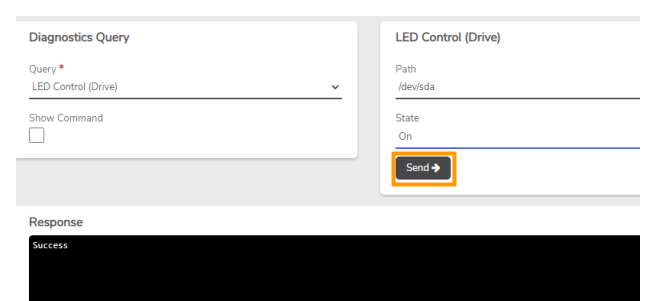 Click Send -> to activate the drive LED .
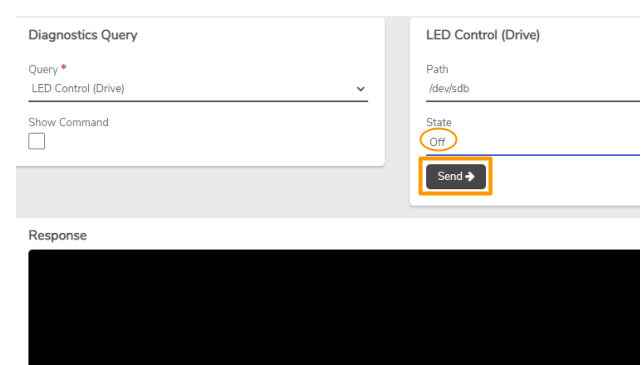
- Once the LED is activated, the physical drive can be located by identifying the one with a solid light. After identifying the drive, deactivate the LED:
To Replace the Drive#
CAUTION: Before initiating a drive repair operation, verify:
1. All nodes are operational (none are powered off or in maintenance mode); 2. Other drive repairs are not in process on a different node for the same storage tier (Drive repairs running on the same physical node pose no problem.); 3. The correct physical drive is confidently identified before removal (See directions above.) {.is-warning}
- From the node dashboard, click Drives.
- Click to select the particular drive (Selected drive shows a check mark on the left.)
- Click Close/Take Offline on the left menu.
-
When the drive status appears as Offline: physically remove the drive, being extremely careful to remove the correct drive.
-
Verify the UI reflects the drive is missing to verify that the proper drive was removed.
- Insert the replacement drive.
- Wait for the drive to be detected; the dashboard will show the new drive as Offline.
- Click Format on the left menu.
- Wait until the dashboard no longer indicates the disk is formatting.
- Click Initialize on the left menu.
After the vSAN has completed a full walk, the repair process will begin, and the drive status will change to "Repairing"; at this point the drive dashboard will indicate an Estimated Repair Completion date and time. {.is-success}
DURING THE REPAIR PROCESS:
Do NOT restart, reset or power off any nodes until the drive shows a status of "Online"; it is important that all other nodes remain fully operational during the repair process.
Additional drive replace/repair operations should NOT be initiated until this repair operation has fully completed** unless the additional drive resides: within the same node - OR - on another storage tier. {.is-warning}