Using Azure AD for Authentication#
To Configure an Azure AD Authorization Source#
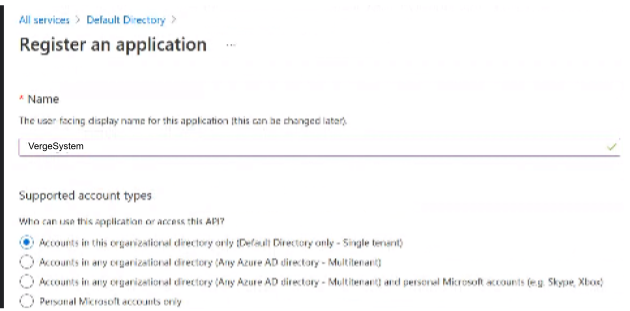
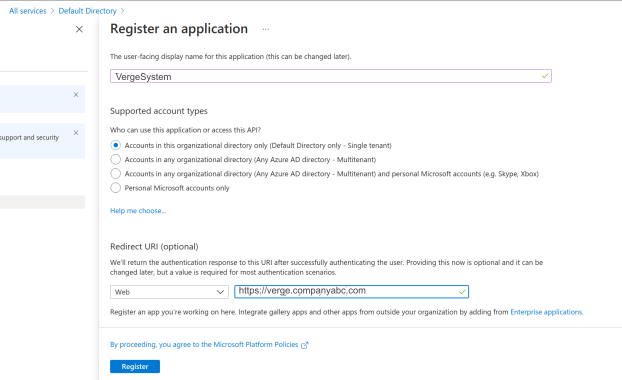
- In Azure services: register a single-tenant web application, setting the Redirect URI to the URL of the VergeOS system and creating a new client secret. Azure Active Directory -> App Registrations -> New Registration
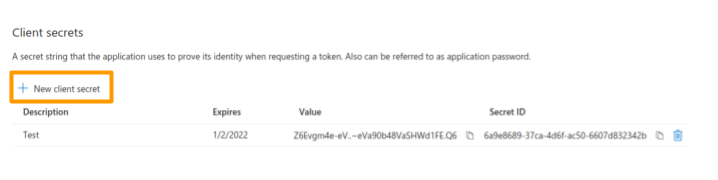
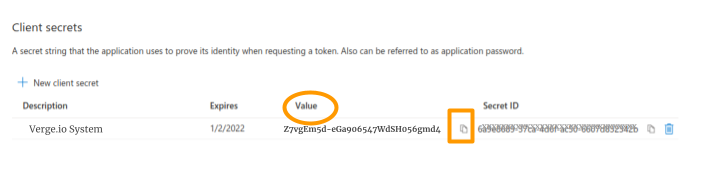
- Create a new client secret. App Registrations -> Client Credentials -> Add a certificate or secret. Click +New client secret.
- Enter a description and expiration date for the new client secret.
-
Obtain the following from Azure to be used in configuration of the authorization source within VergeOS:
- Tenant ID (Hint: All services -> Azure Active Directory -> Overview. The Tenant ID is listed under Basic Information.)
-
Client ID (Hint: Azure App Registrations-> Configured Item -> Client Credentials.)
-
Client Secret (Hint: Azure App Registrations-> Configured Item -> Client Credentials; use the "VALUE" field.)
- From the VergeOS Main Dashboard click System on the left menu.
- Click Authorization Sources on the left menu.
- Click New on the left menu.
- Enter a Name for the source (such as "Azure"). This name will appear on the sign-in button of the VergeOS login page.
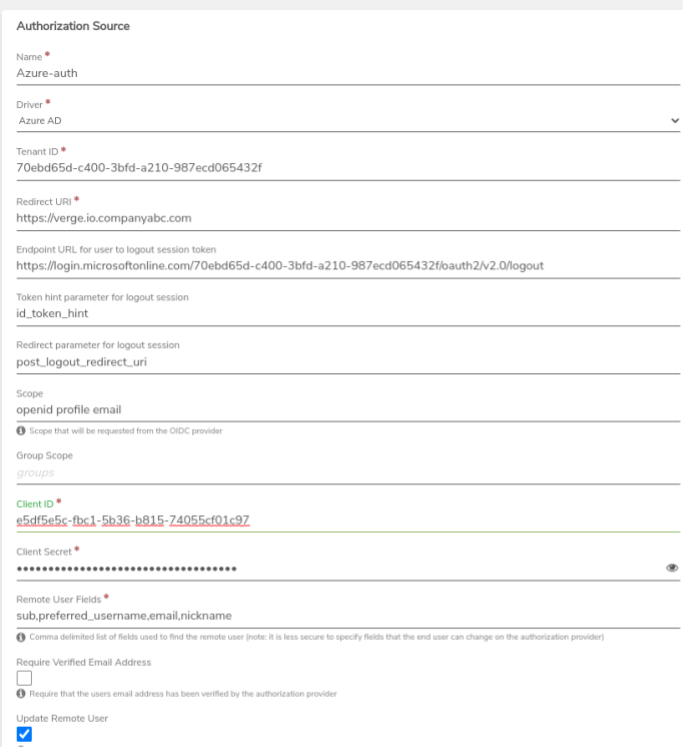
- In the Driver field (dropdown list), select Azure AD.
- Enter the Tenant ID obtained in the previous step.
- The Redirect URI should be the URL to your VergeOS system (for ex: https://verge.io.mycompanyabc.com)
- Enter Endpoint URL for user to logout session token (https://login.microsoftonline.com/TENANTID/oauth2/v2.0/logout)
- Scope should typically be left at the default value: "OpenID profile email".
- Group Scope needs to be set if users should be auto-created based on group membership; typically, this is set to the word "groups" with no punctuation.
- Enter the Client ID obtained in the previous step.
- Enter the Client Secret obtained in the previous step.
- Remote User Fields defines the list of fields used to initially find the Azure user; this field is auto-populated with (sub,preferred_username,email nickname), a default list that can typically work for most implementations. Note: For security reasons, it is not recommended to locate remote users based on fields that are changeable by the end user on the remote system.
- To carry over group membership from Azure to VergeOS, check the Update Group Membership checkbox. Groups must be created in VergeOS using instructions below.
- User Auto-Creation Features (optional): Users can be auto-created upon initial login to VergeOS; this can be selected for all Azure AD users -OR- limited to users in specified Azure AD groups.
-
Auto-Create Users -If all users should be auto-created, enter * here.
-
Auto Create Users in Group - To only auto-create users that are members of specified Azure AD groups, enter the Azure group object ID(s) in regular expression (regex) form.
Multiple specific group IDs can be entered using the format: (ID)|(ID)|(ID) {.is-success}
- the Group Scope must be defined. (Group Scope field defined above)
- Token Configuration must be setup in Azure AD (instructions below).
- Azure AD groups specified for Auto Create must be created on the VergeOS side (instructions below).
- To auto-create based on group, the Auto Create Users field must be blank
-
Options (recommended to be enabled):#
- Update Remote User: - once the user is located in Azure AD, update VergeOS user Remote Username field to the corresponding Azure unique ID.
Enabling the Update Remote User will allow the VergeOS system to store the unique Azure ID in the VergeOS user record (after initially locating the Azure AD user with fields defined in Remote User Fields), so the unique identifier can subsequently be used for finding Azure AD user; this is typically recommended since fields such as email address are subject to change. {.is-info}
- Update User Email Address: - Update VergeOS user Email address to match email address within Azure.
- Update User Display Name: - Update VergeOS user display name to match display name within Azure.
- Update Group Membership: - Update the groups that a VergeOS user is a member of. (A Group Scope is required for this to function.)
-
Additional Optional Fields:#
See Authorization Sources (General) for information regarding additional optional Fields.
Adding Azure Groups to Verge OS#
Interfacing with Azure groups requires a token on the Azure AD app registration and creation of groups in VergeOS:
To set up a Token Configuration in Azure AD#
- Navigate to the App registration page for the App created above.
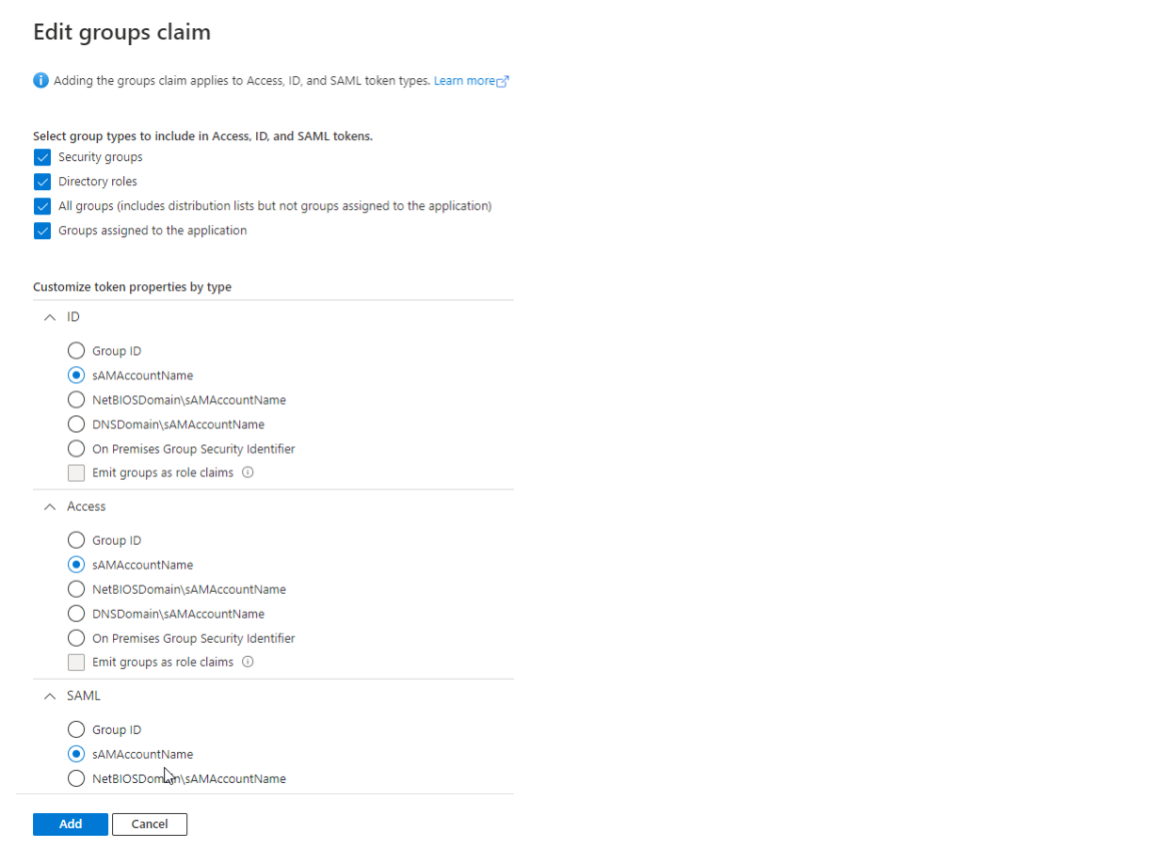
- Click on Token Configuration on the left menu and click +Add groups claim.
- Check the appropriate group types.
- Set the ID, Access, and SAML to sAMAccountName.
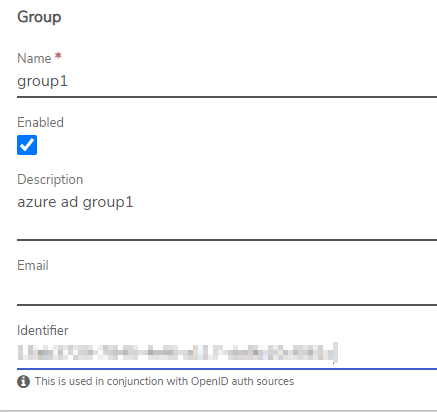
To Add Azure Groups to Verge OS#
- Navigate to System -> Groups.
- Click New on the left menu.
- Enter the group Name to match the group name in Azure AD.
- Optionally, an Email can be entered for the group. This email address is used for sending subscription alerts and/or reports assigned to the group.
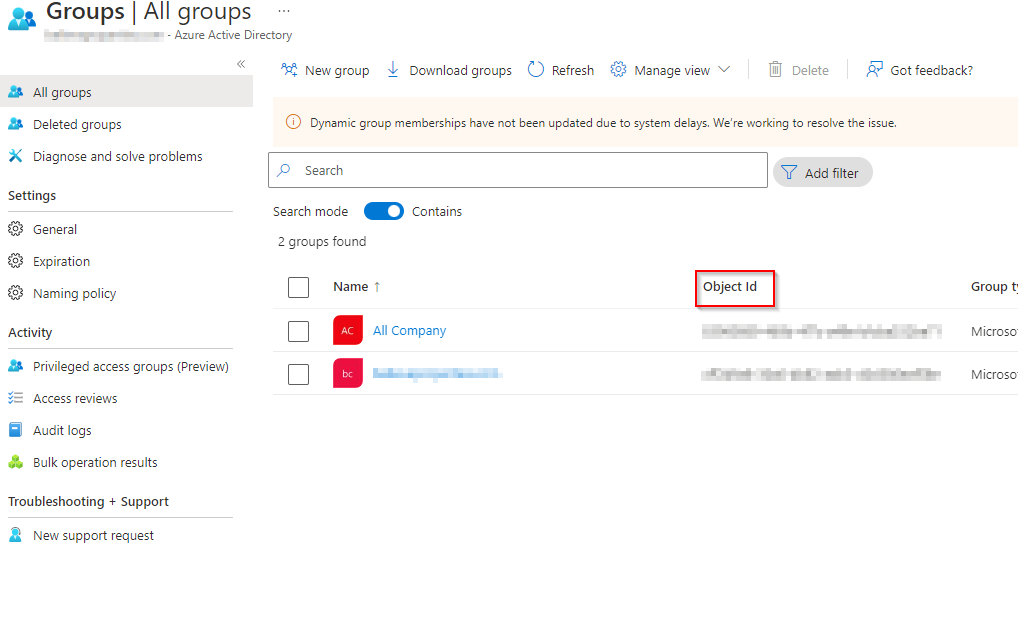
- Copy the coordinating Object Id from the Groups/All Groups page in Azure AD to the Identifier field.
- Click Submit (bottom of the page) to save the new group.
Manually Adding Users from Azure#
After the Azure auth source is created, users can be manually created in VergeOS to utilize the Authorization source for login authentication. Manually creating users is only necessary when users are not configured to be auto-created.
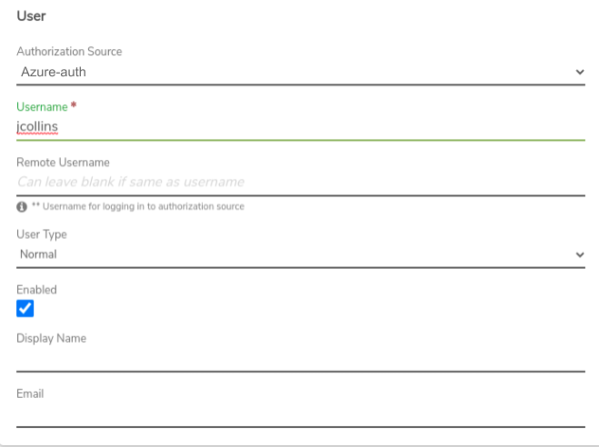
To Add VergeOS Users that will use the Azure AD Auth#
When creating the new user, use the following configuration:
- Authorization Source: Select the Azure AD source from the dropdown list
- Username: unique name within the VergeOS system; typically it is recommended to use the Azure principal name.
- Remote Username: use value of one of the fields defined as Remote User fields these are fields that are searched on in Azure (e.g. username, email)
- Display Name: (optional) If Update User Display Name is enabled on the Azure AD auth source, display name will automatically synchronize from the Azure AD user.
- Email Address: (optional) If Update User Email Address is enabled on the Azure AD auth source, Email address will automatically synchronize from the Azure AD user.