IPsec Example - Dedicated Public IP
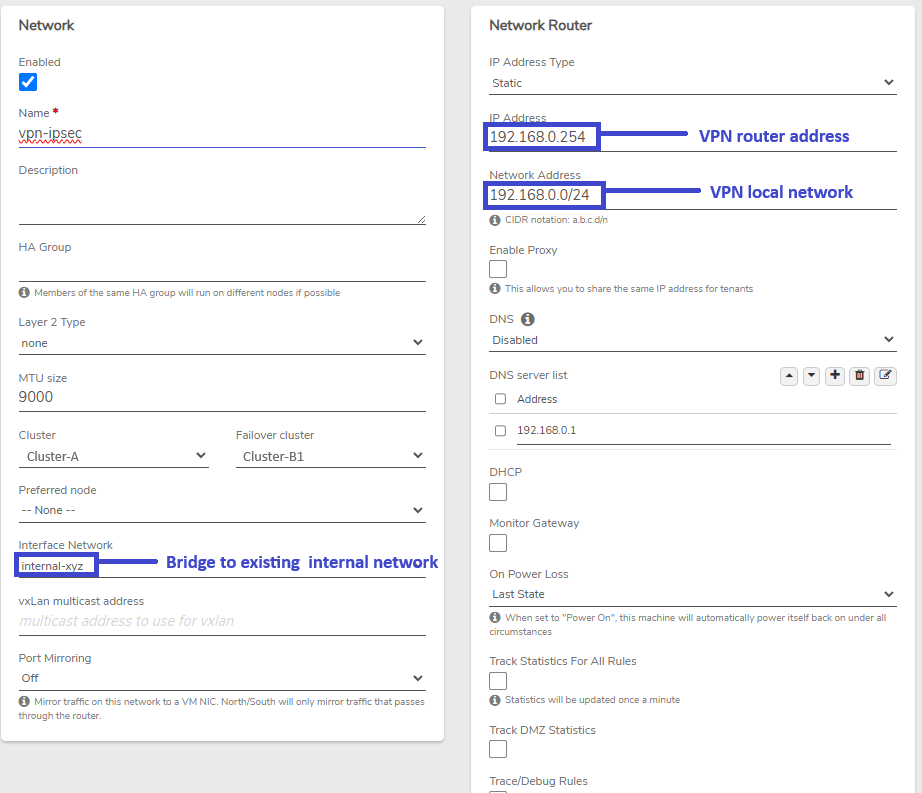
The following IPsec example utilizes a dedicated public IP address for a VPN tunnel. The VPN router is bridged to an existing internal network to provide Layer 2-connectivity to that network.
IPsec is a complex framework that supports a vast array of configuration combinations with many ways to achieve the same goal, making it impossible to provide one-size-fits-all instructions. Sample configurations are given for reference and should be tailored to meet the particular environment and requirements.
Consult the IPsec Product Guide Page for step-by-step general instructions on creating an IPsec tunnel.
- VPN Network Name: vpn-ipsec
- VPN Router address: 192.168.0.254
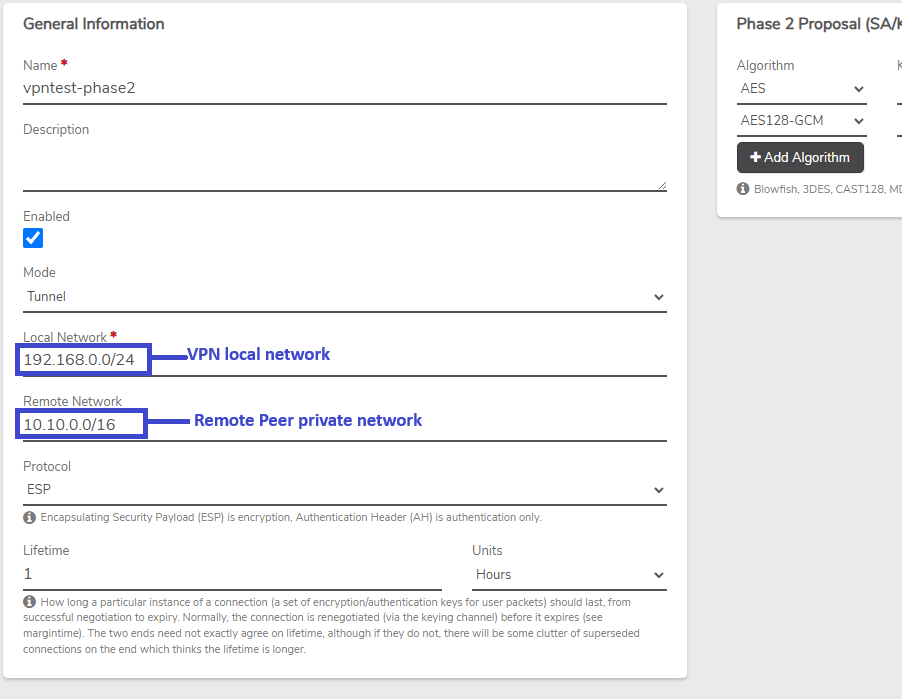
- Local VPN network: 192.168.0.0/24
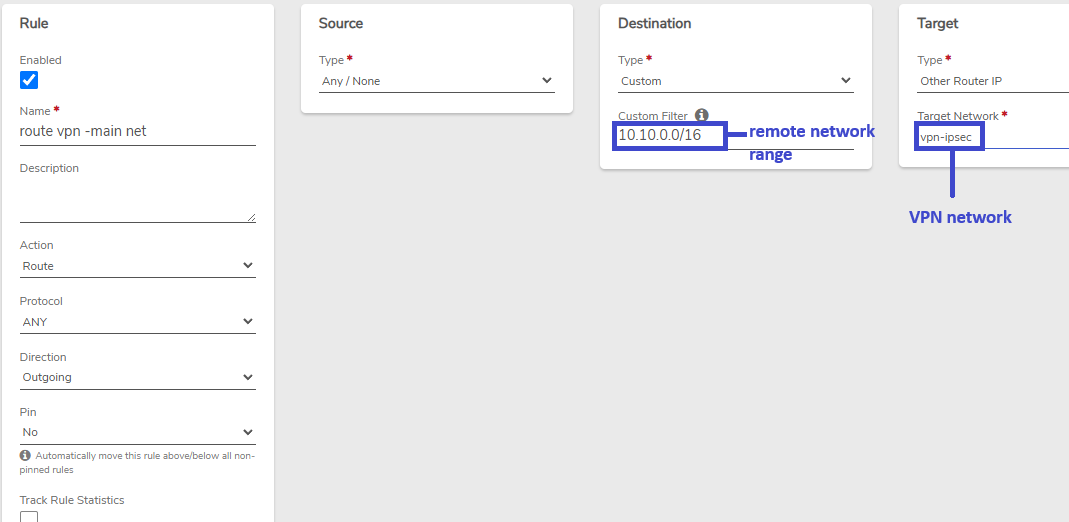
- Remote VPN network: 10.10.0.0/16
- Bridged Internal Network Name: Internal-xyz
- External Network Name: External
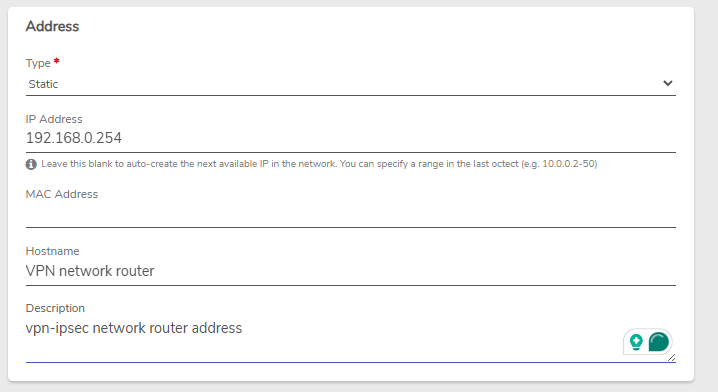
Static Lease
We navigate to Internal-xyz* > IP Addresses > New to reserve a static address for the VPN router on this internal network in order avoiding another entity from taking the same IP address. Full instructions for creating a static lease can be found here: Create a DHCP Static Lease.
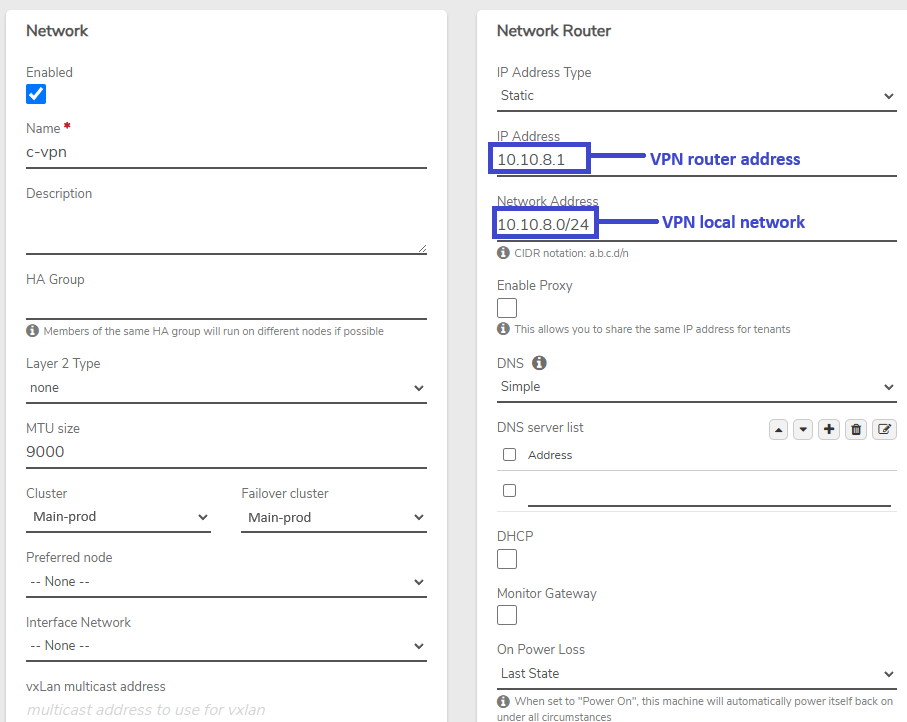
VPN Network Configuration
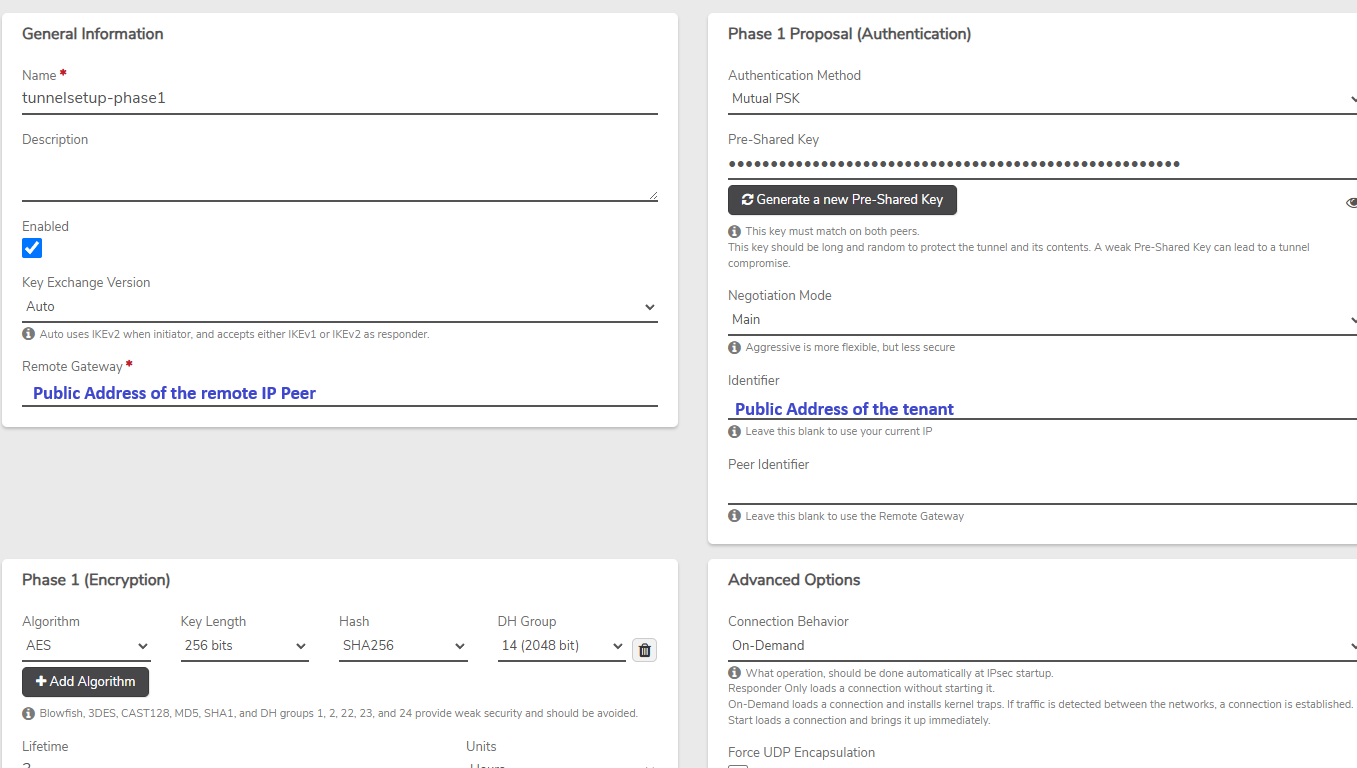
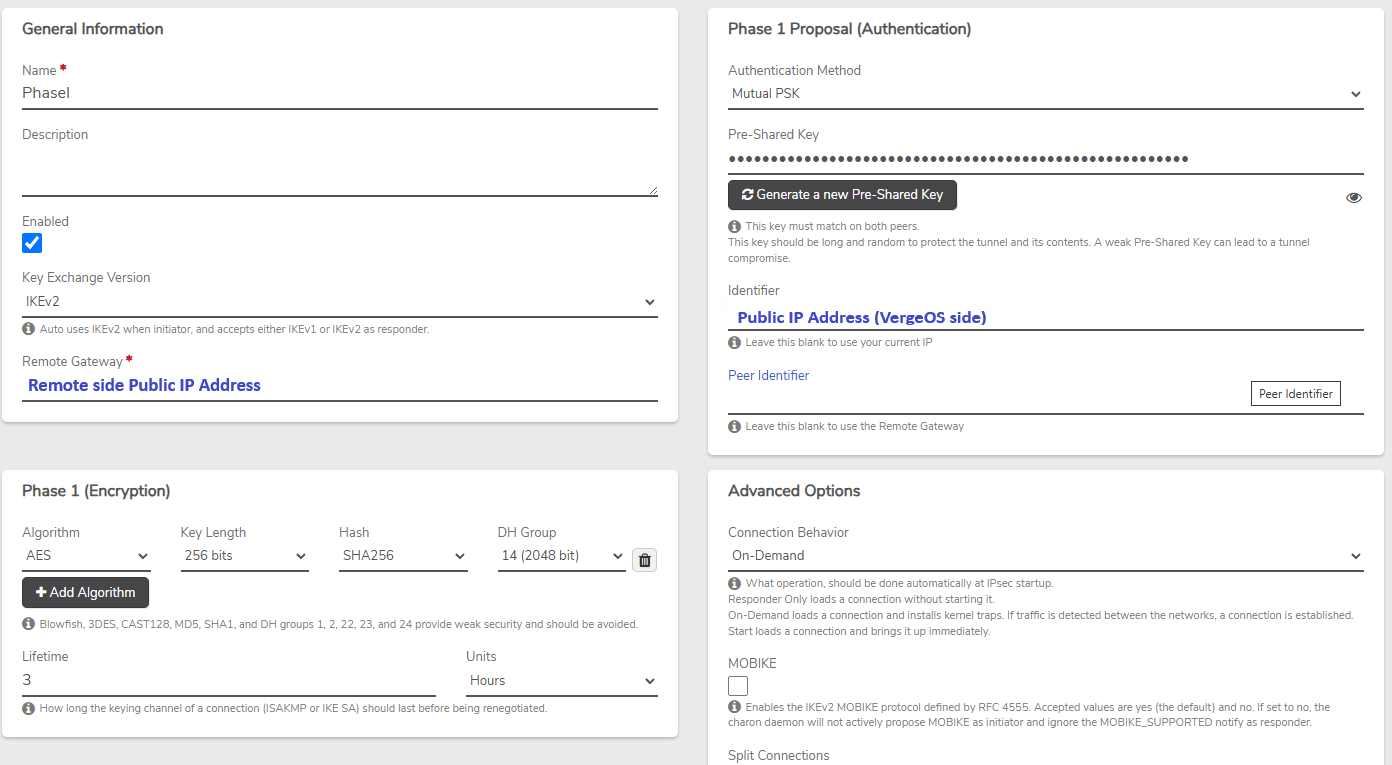
Phase 1
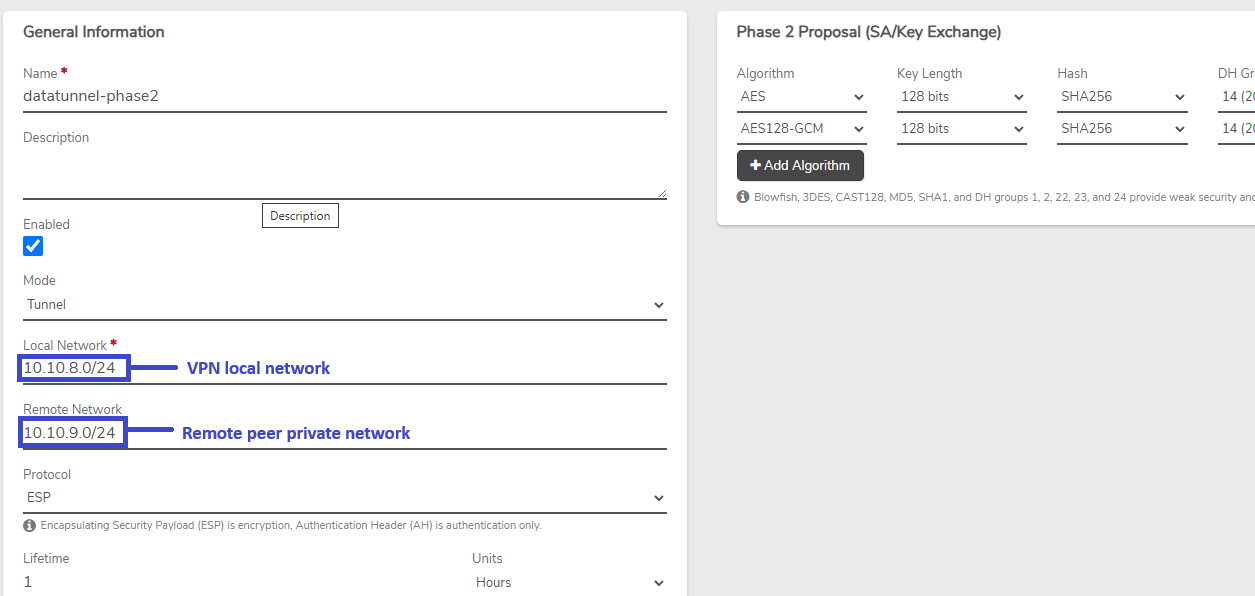
Phase 2
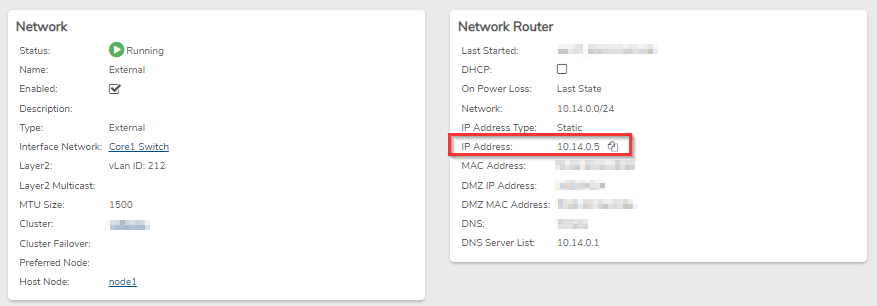
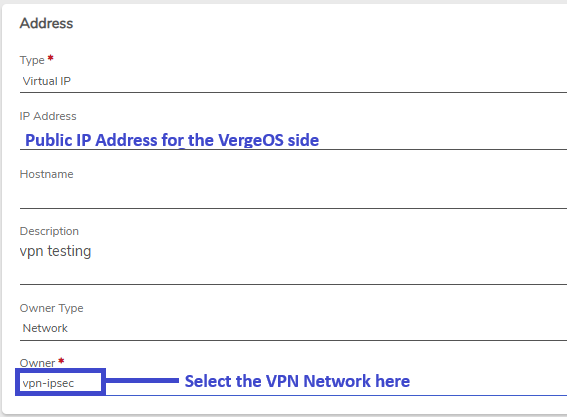
Assigned Public IP Address
The public address must be Assigned from the External network to the VPN network.
Default VPN Network Rules
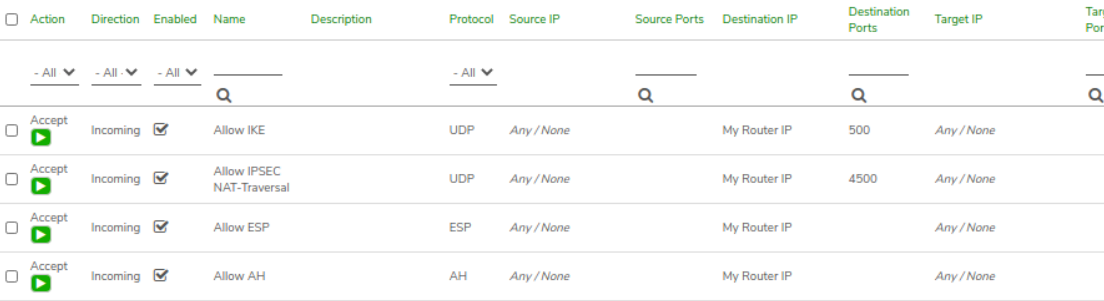
Default Firewall Rules - The following necessary firewall rules are created automatically when a VPN network is created:
- Allow IKE: Accept incoming UDP traffic on port 500 to My Router IP
- Allow IPsec NAT-Traversal: Accept incoming UDP traffic on port 4500 to My Router IP
- Allow ESP: Accept incoming ESP protocol traffic to My Router IP
- Allow AH: Accept incoming AH protocol traffic to My Router IP
These rules can be modified to restrict to specific source addresses, where appropriate.
Additional VPN Network Rules
Additional rules need to be created on our new VPN network:
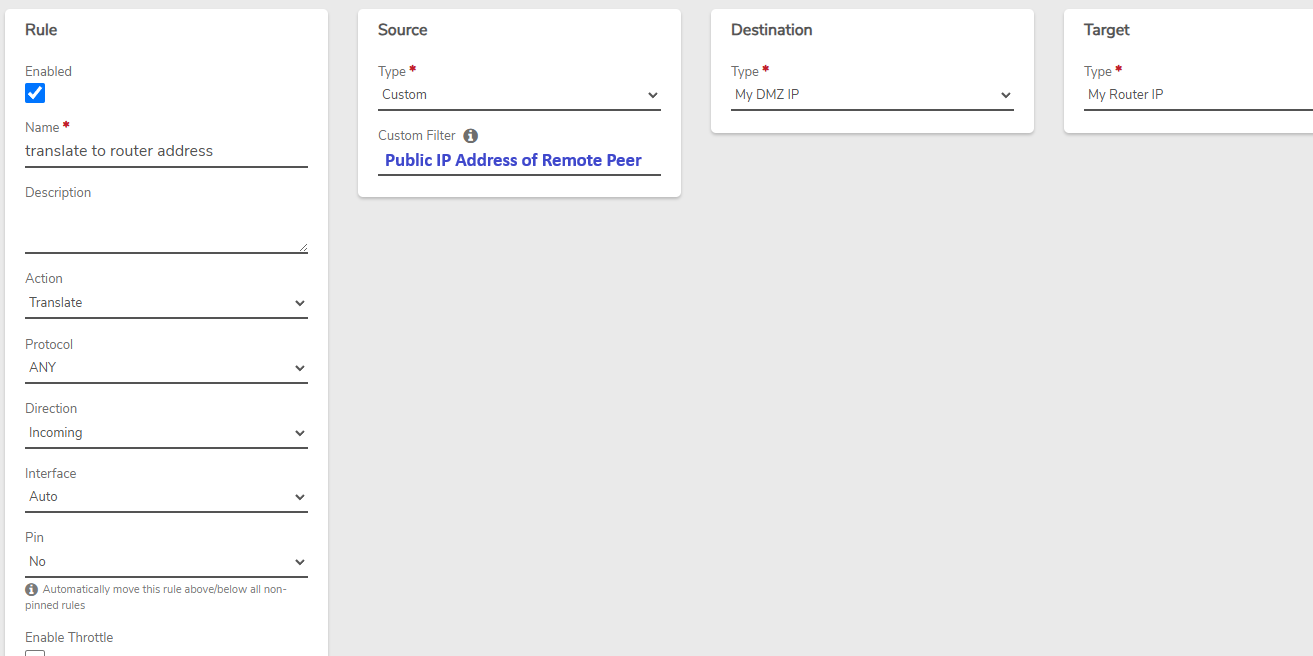
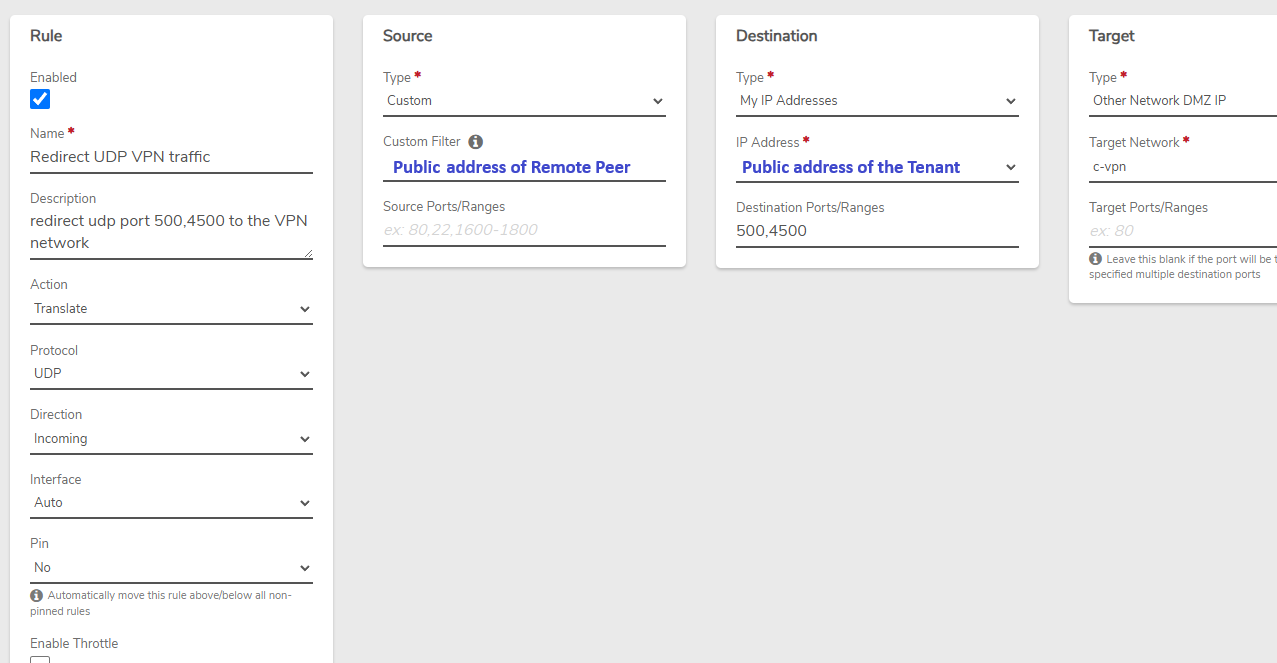
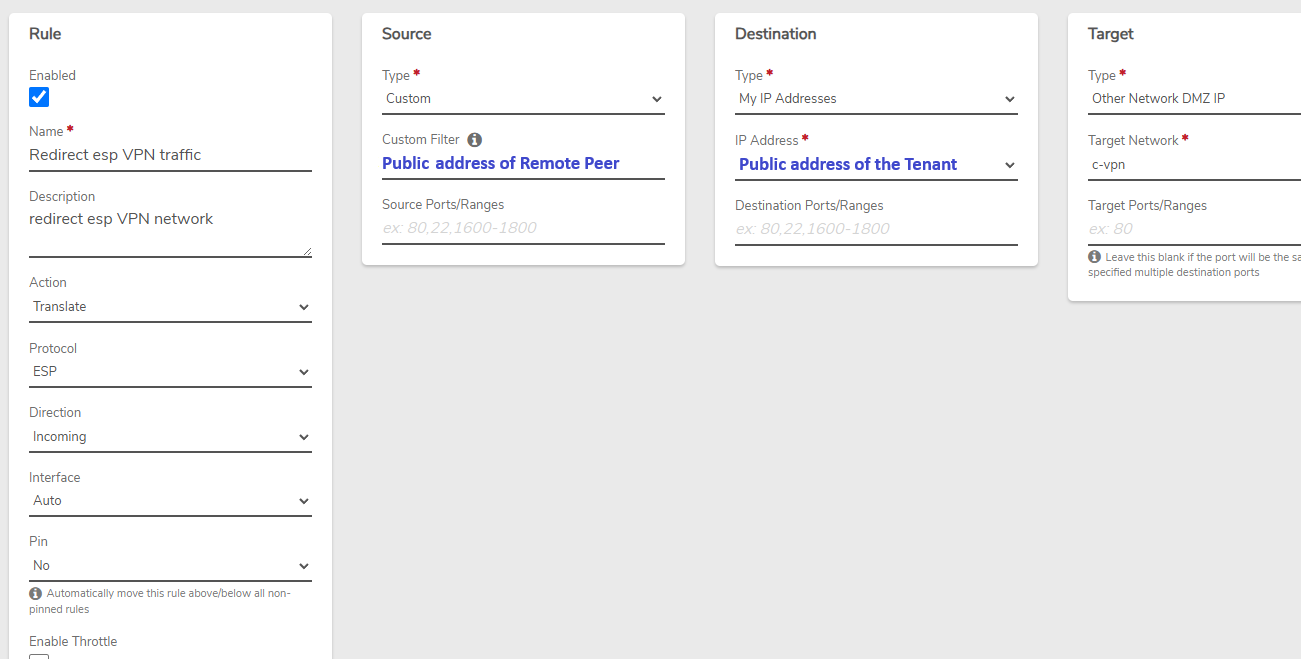
Translate Rule:
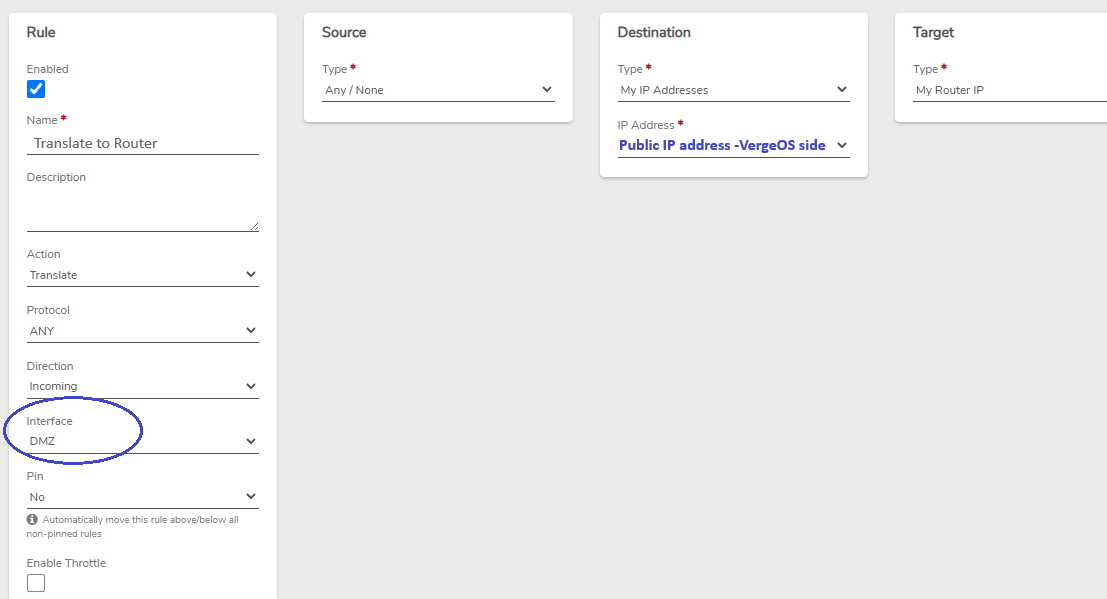
The translate rule must be moved to the top of the rules list, before the Accept Rules. Instructions for changing the order of rules can be found in the Product Guide: Network Rules - Change the Order of Rules
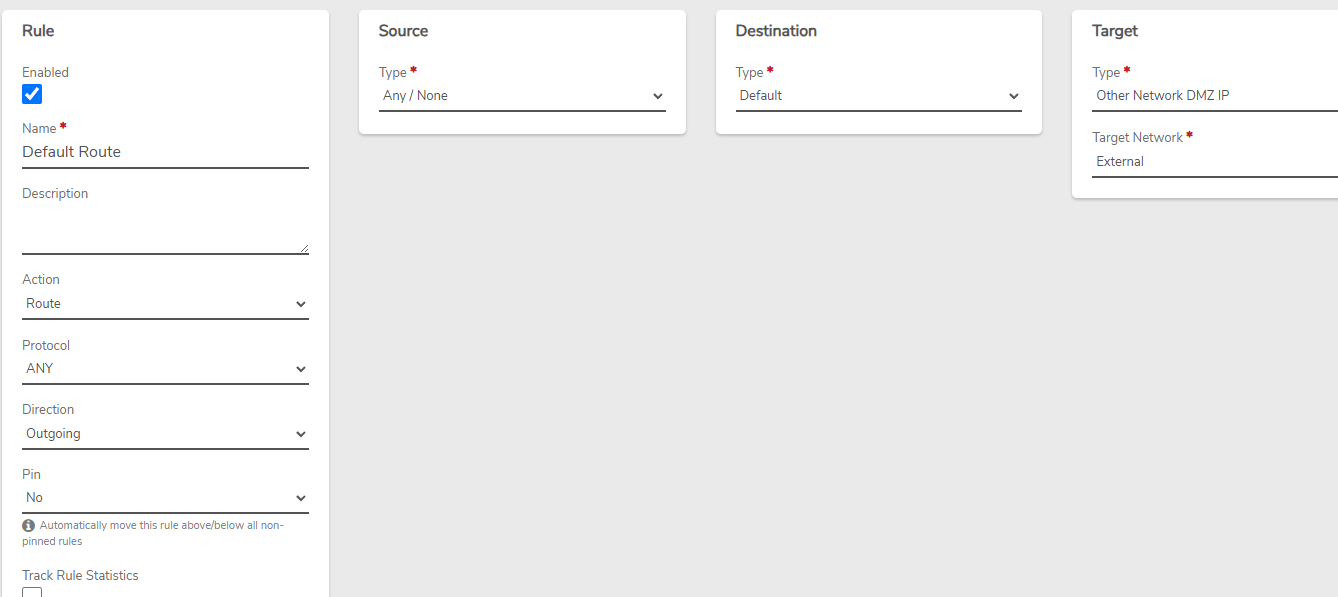
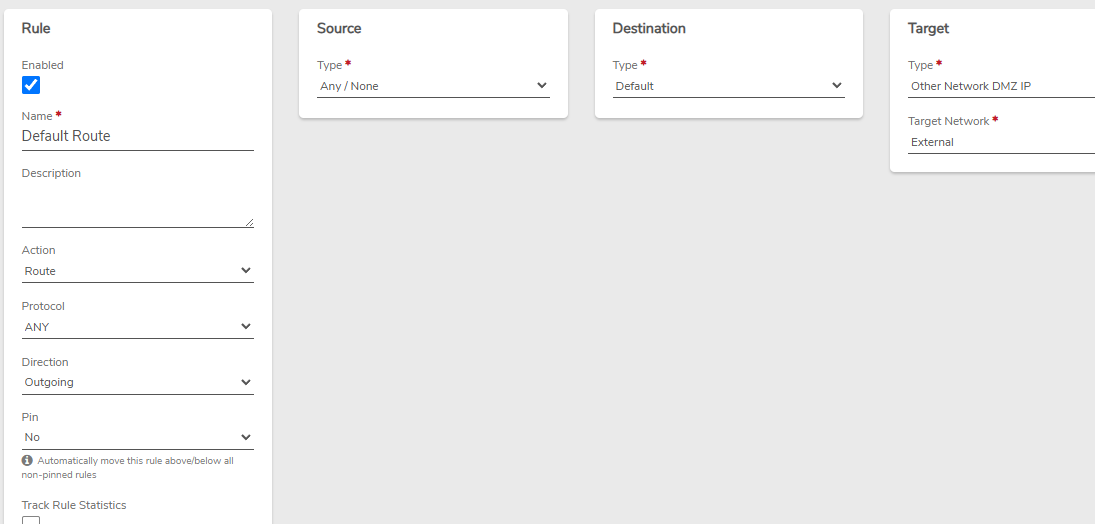
Default Route Rule:
Internal Network Rule
A routing rule is needed on Internal-xyz to route its VPN traffic to the VPN network.
New rules must be applied on each network to put them into effect.