How to Create an IPsec VPN Tunnel in VergeOS#
In VergeOS, the DMZ Network handles basic routing between networks: - Every router has a NIC and an IP address in the DMZ to route traffic between networks inside VergeOS. - Each vNet represents its own VXLAN or VLAN.
These instructions focus on setting up the IPsec Tunnel to connect to a VergeOS Internal Network. If you are connecting to an External Network or have special use cases, network rules must be adjusted accordingly.
Steps to Create an IPsec VPN Tunnel#
Step 1: Reserve a Static IP Address#
Reserve a static IP on the Internal (LAN) network that the VPN connection will use.
-
In this example, the IP address 192.168.0.254 is set to static on the internal network named Internal.
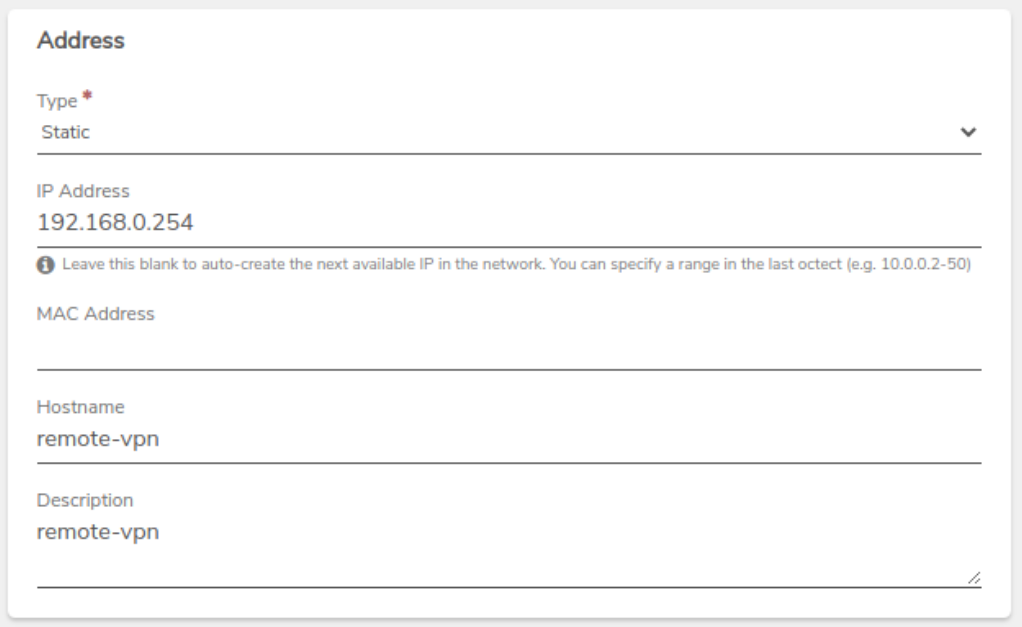
- Type: Set to Static.
- IP Address: Select an available IP address from the system. If there are no available IPs, add a new IP.
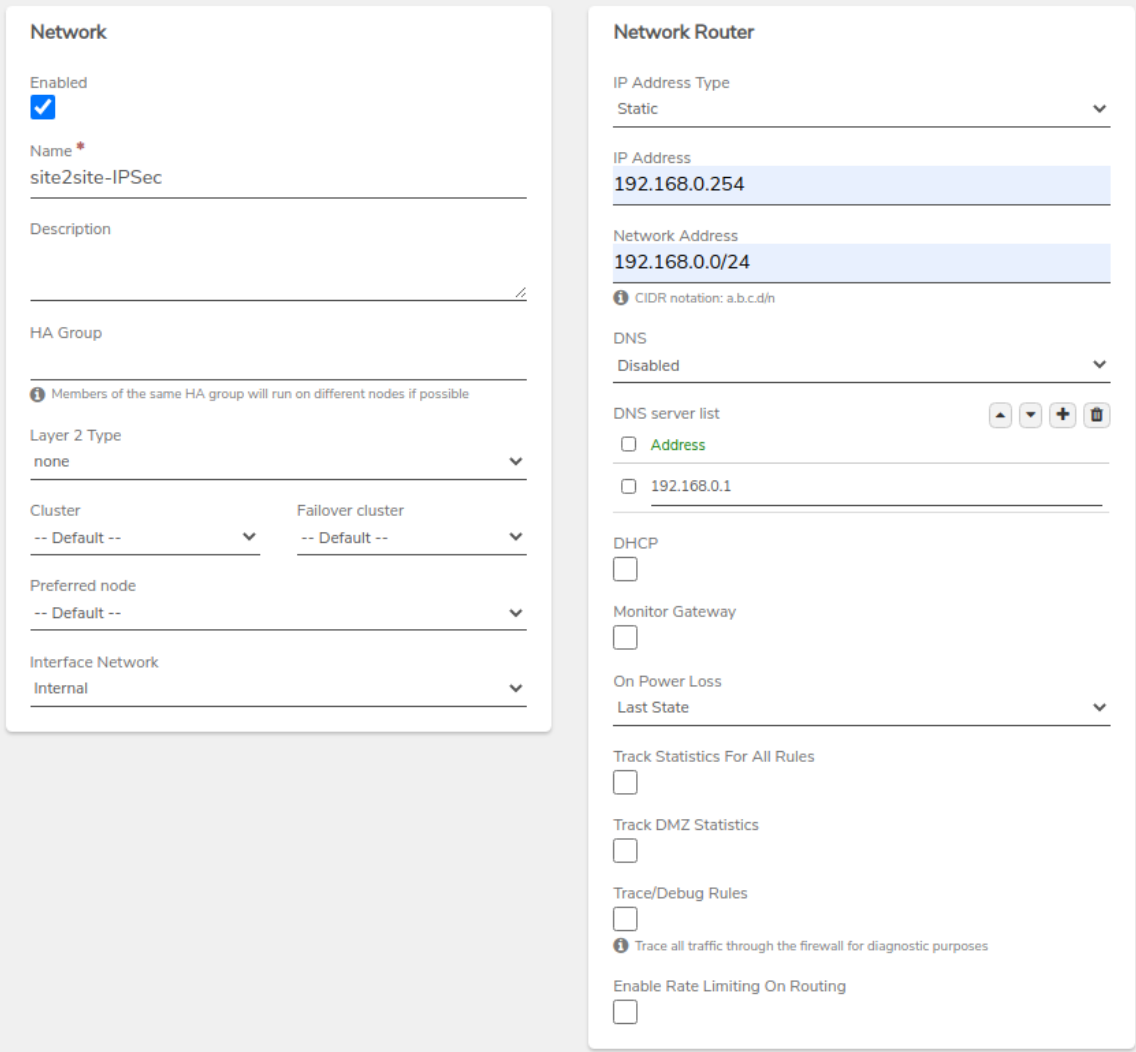
Step 2: Create the VPN Connection#
- Navigate to Main Dashboard > Networks.
- Click New VPN on the left menu.
Configure the settings as required by the connection:
- Layer 2: Set the network layer configuration.
- Interface Network: Select the network that will be bridged to the VPN connection.
- IP Address Type: Set to Static.
-
Network Router IP: Enter the IP address reserved in Step 1.
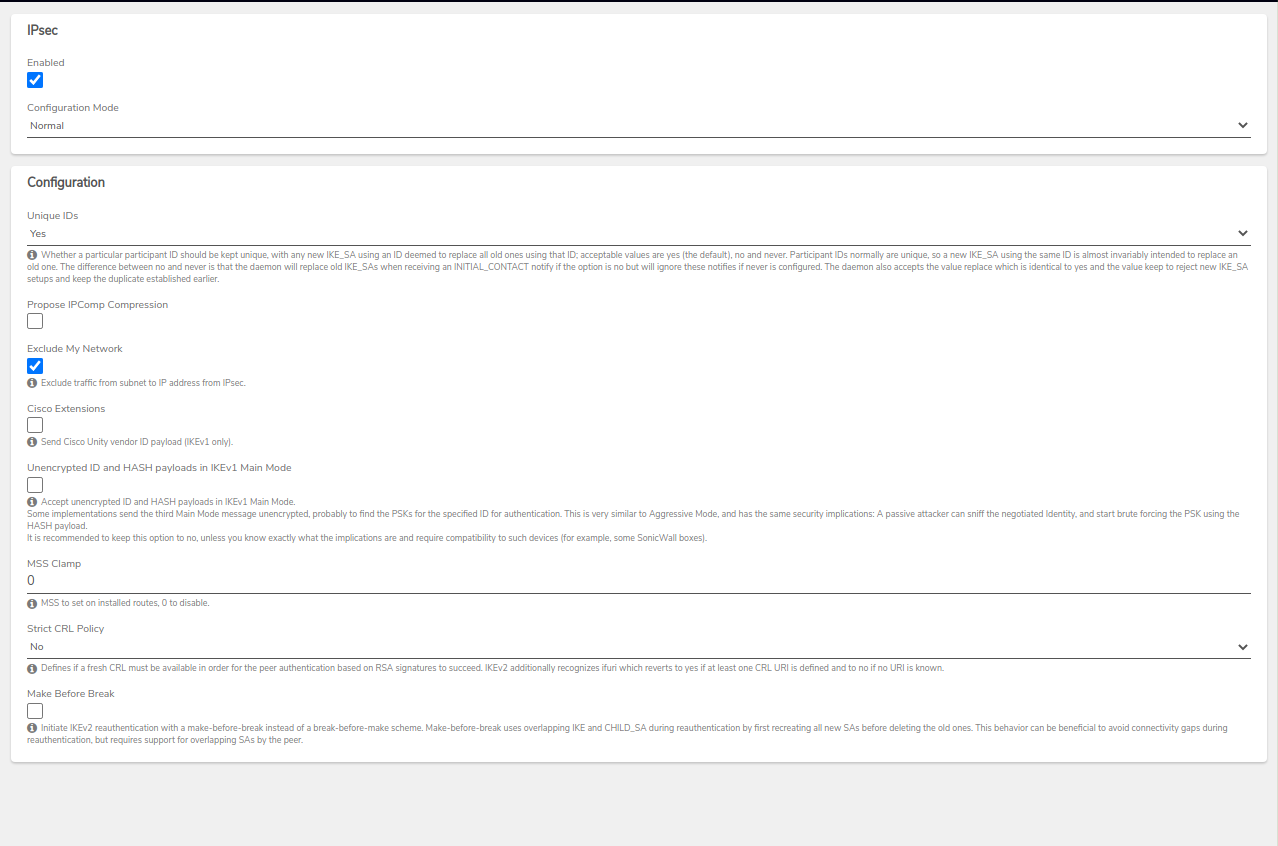
Step 3: Edit IPsec Configuration#
-
From the VPN Dashboard, click on Edit IPsec to modify or add connection-specific details.
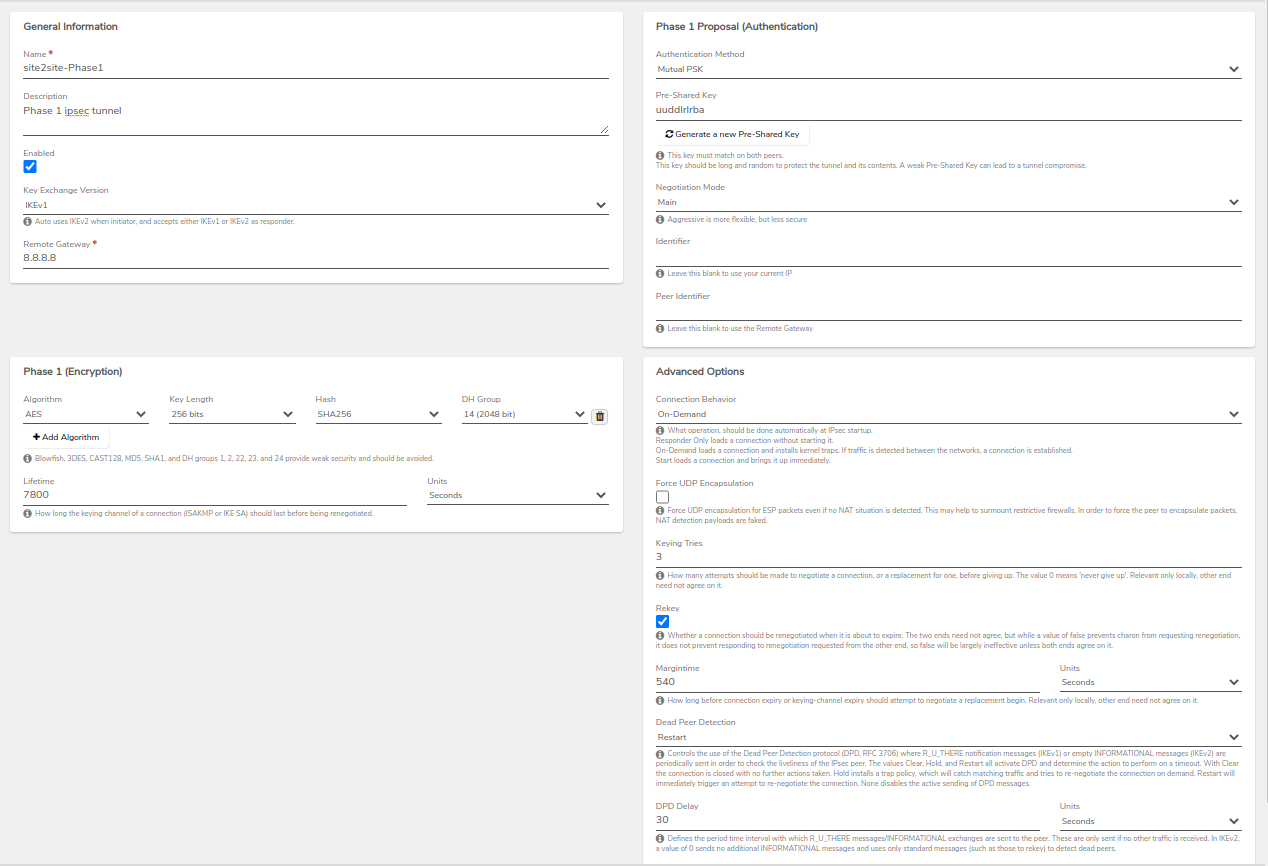
Step 4: Create the IPsec Tunnel#
- Click on IPsec Tunnels to start creating the tunnel between VergeOS and the remote site.
-
- Remote Gateway: Configure according to the connection requirements.
- Phase 1 Proposal (Authentication): Set the authentication method and Pre-Shared Key.
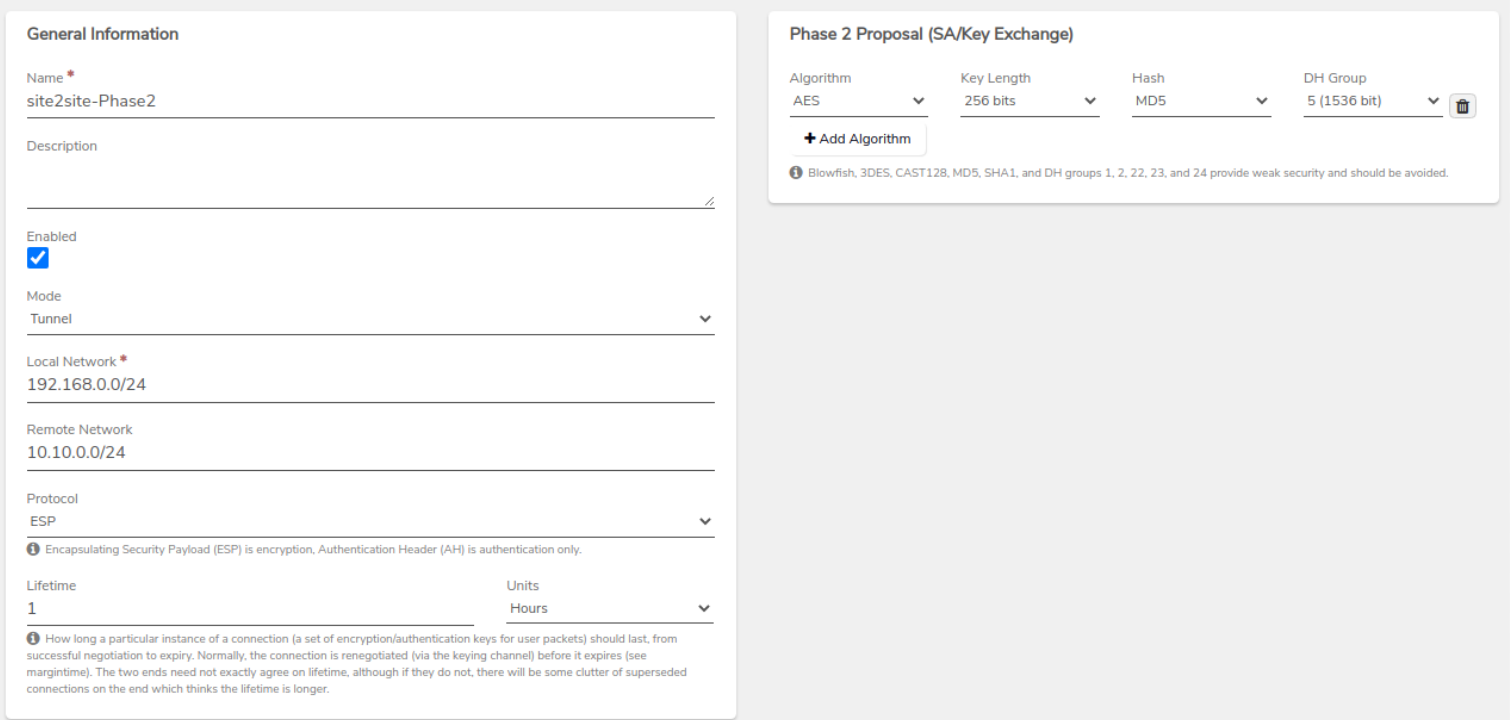
Step 5: Configure Phase 2#
After completing Phase 1, you will be prompted to configure Phase 2.
- Mode: Set to Tunnel.
- Local Network and Remote Network: Configure as required.
-
Phase 2 Proposal: Enter the details as needed for the connection.
This will automatically create rules for the VPN network.
Reviewing and Configuring VPN Network Rules#
Step 6: Review VPN Network Rules#
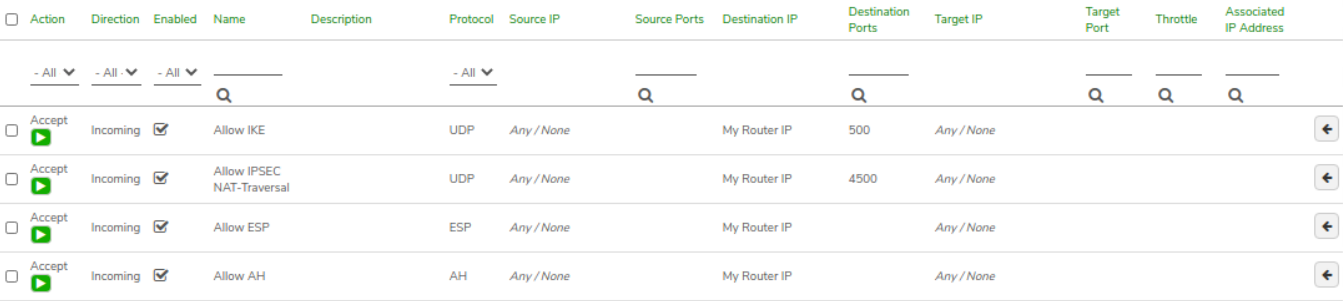
Verify the rules that were automatically created during VPN setup.
- Allow IKE: Accept incoming UDP traffic on port 500 to My Router IP.
- Allow IPsec NAT-Traversal: Accept incoming UDP traffic on port 4500 to My Router IP.
- Allow ESP: Accept incoming ESP protocol traffic to My Router IP.
-
Allow AH: Accept incoming AH protocol traffic to My Router IP.
Step 7: Assign a Virtual IP to the VPN Network#
Assign a new virtual IP to the VPN network from the External network (Public side of the VPN tunnel).
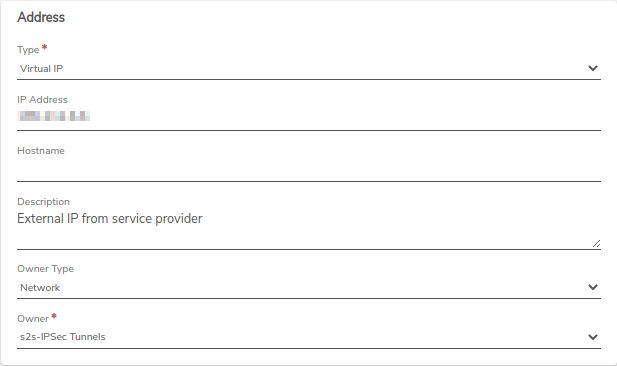
This automatically creates an outgoing route rule on the VPN network with that virtual IP address. Ensure the rule is applied.
Step 8: Create VPN Network Rules#
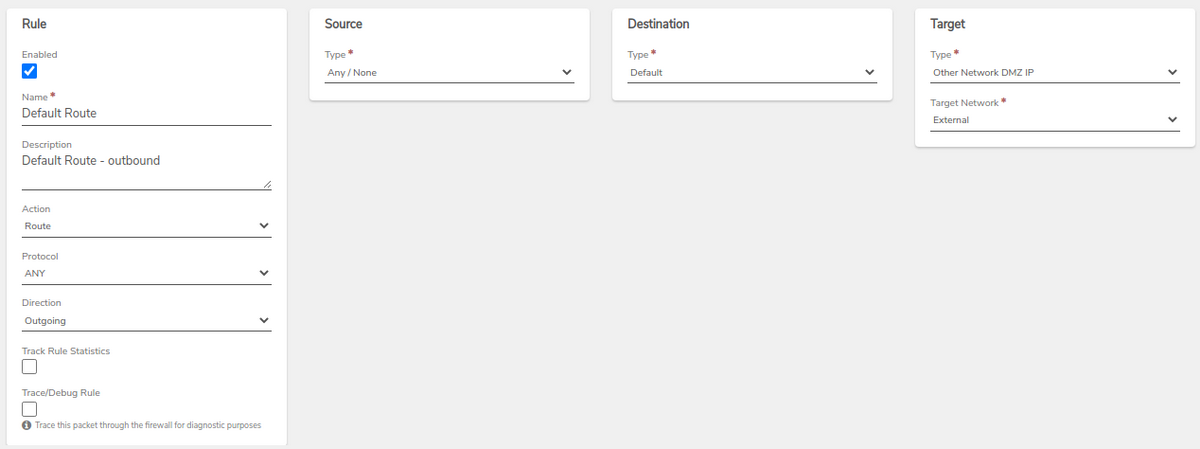
-
Create a Default Route rule for the new VPN network to define the default outbound path for traffic inside this network.
-
Create an sNAT Rule on the new VPN network to mask external traffic.
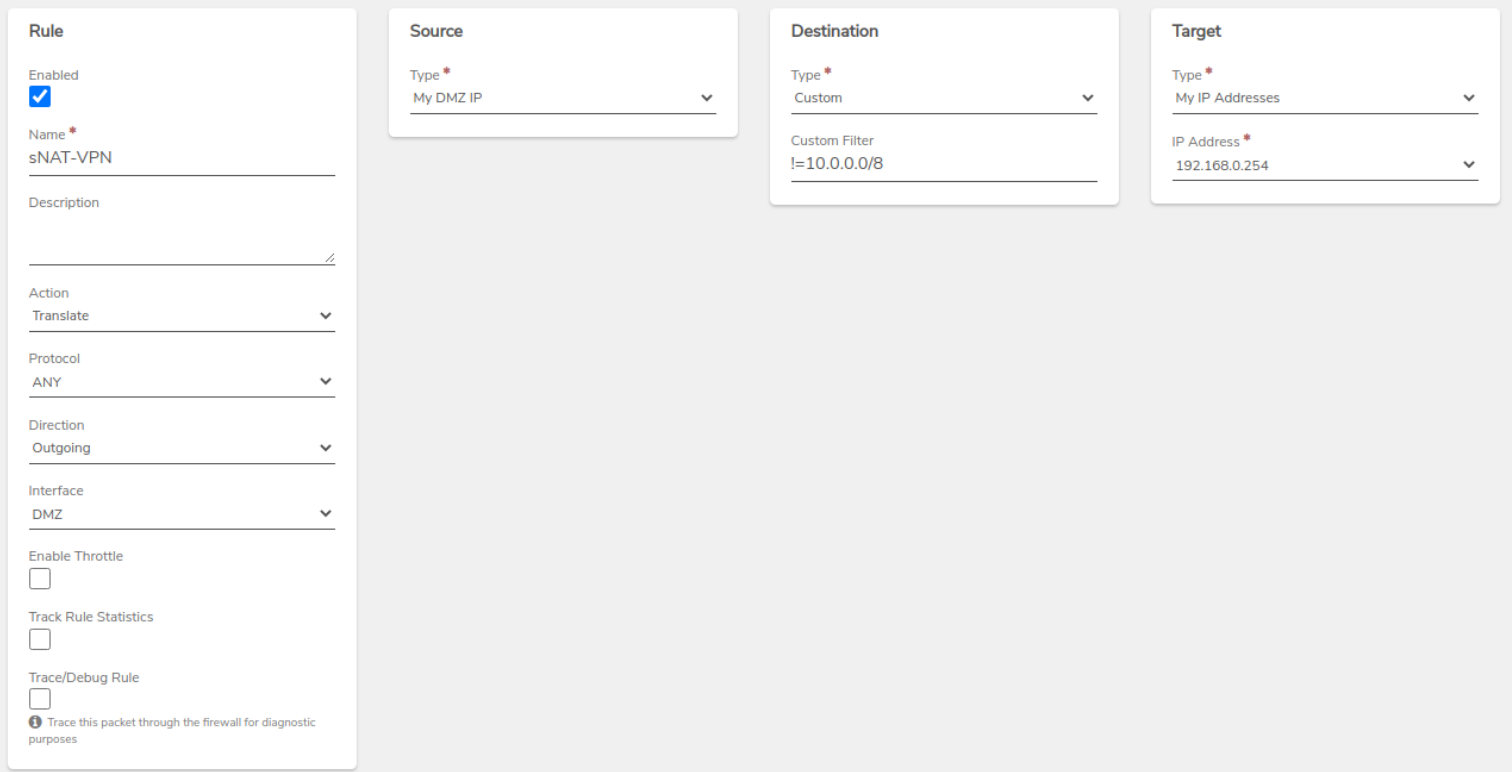
-
Create a General sNAT Rule as a catchall for traffic from this network.
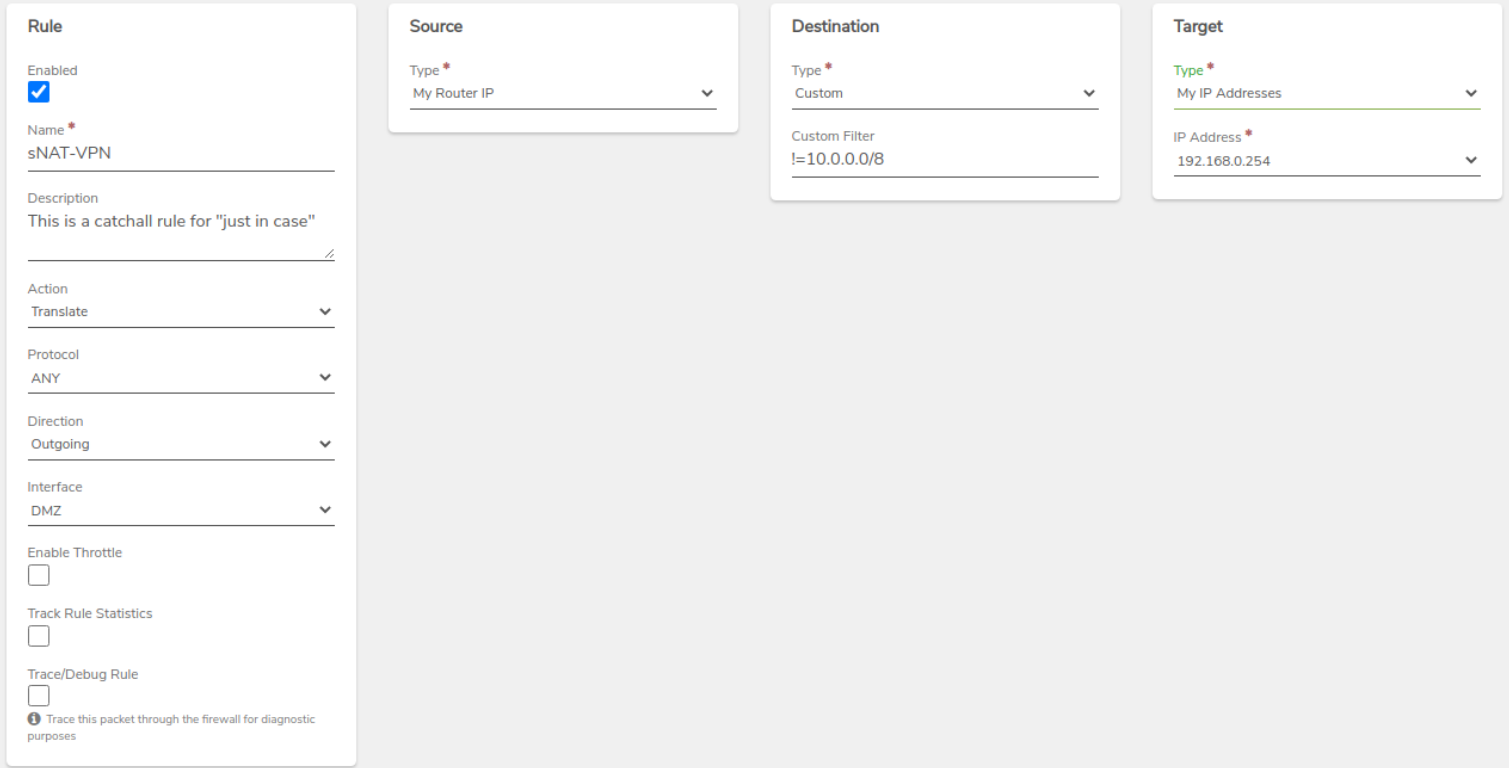
-
Create a Translate Rule to allow traffic from the VPN tunnel to access this network.
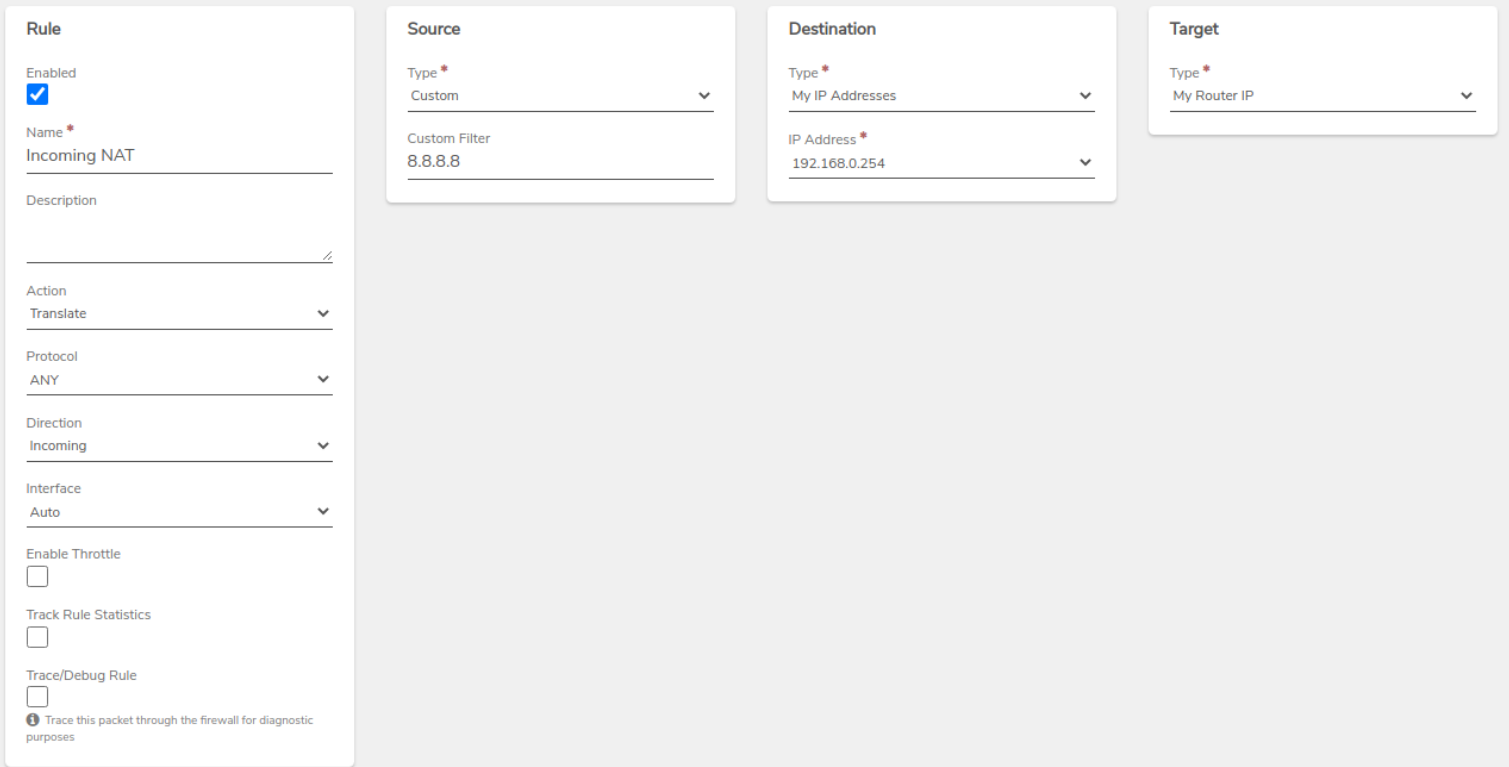
-
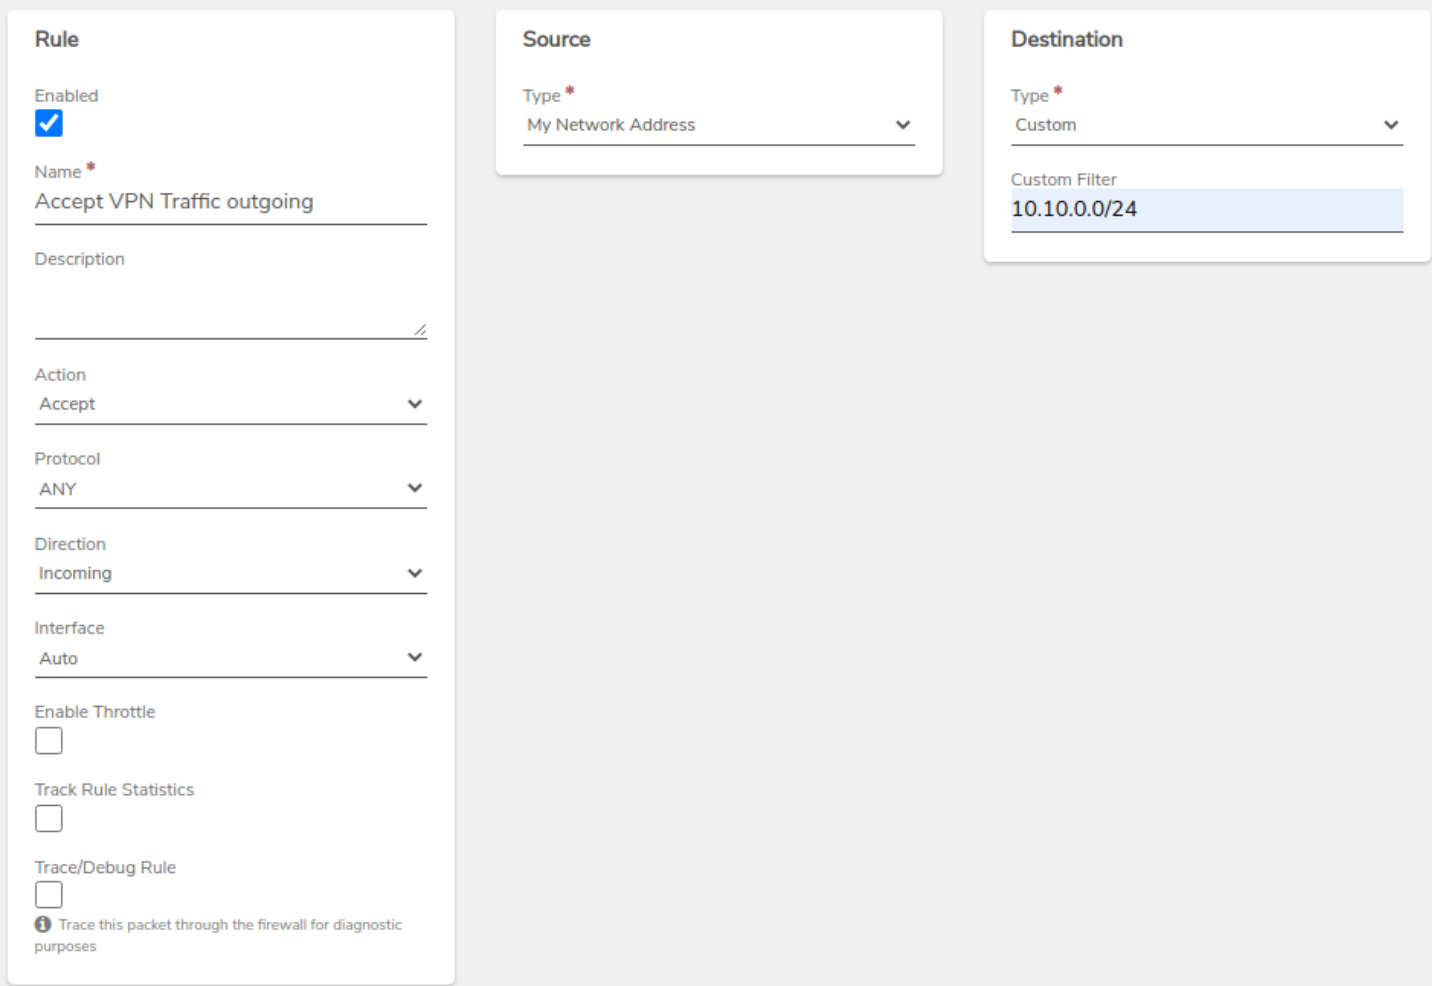
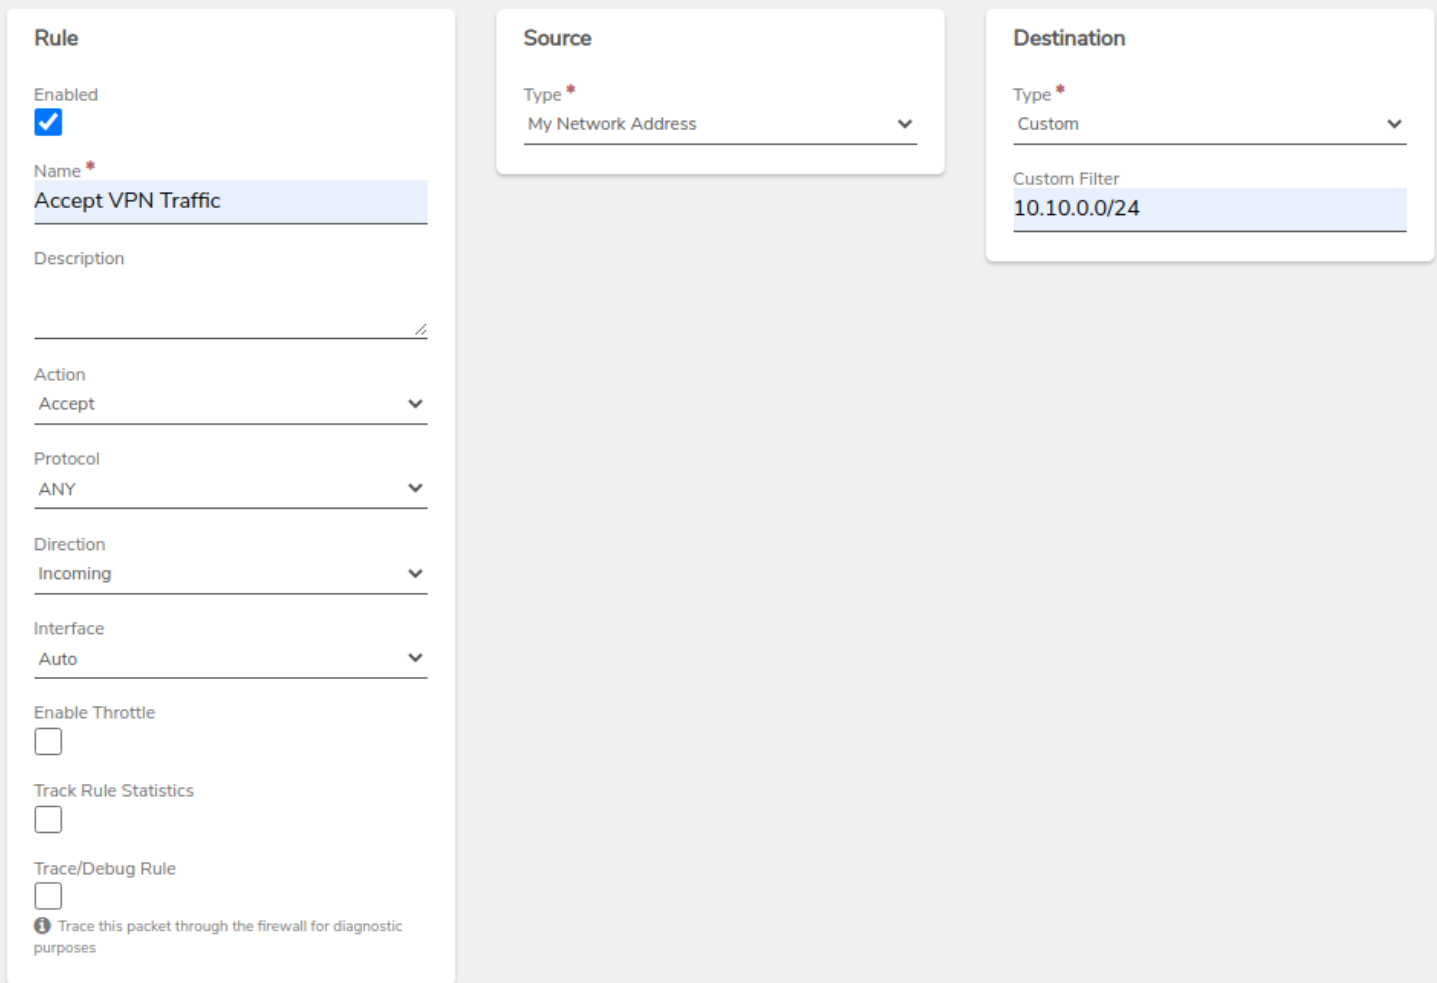
Create Accept Rules:
- One rule to allow incoming traffic from the remote network.
- Another rule to accept traffic within the VPN network.
Step 9: Create Internal Network Rules#
-
Create a Route Rule on the Internal network to send traffic properly through the VPN tunnel.
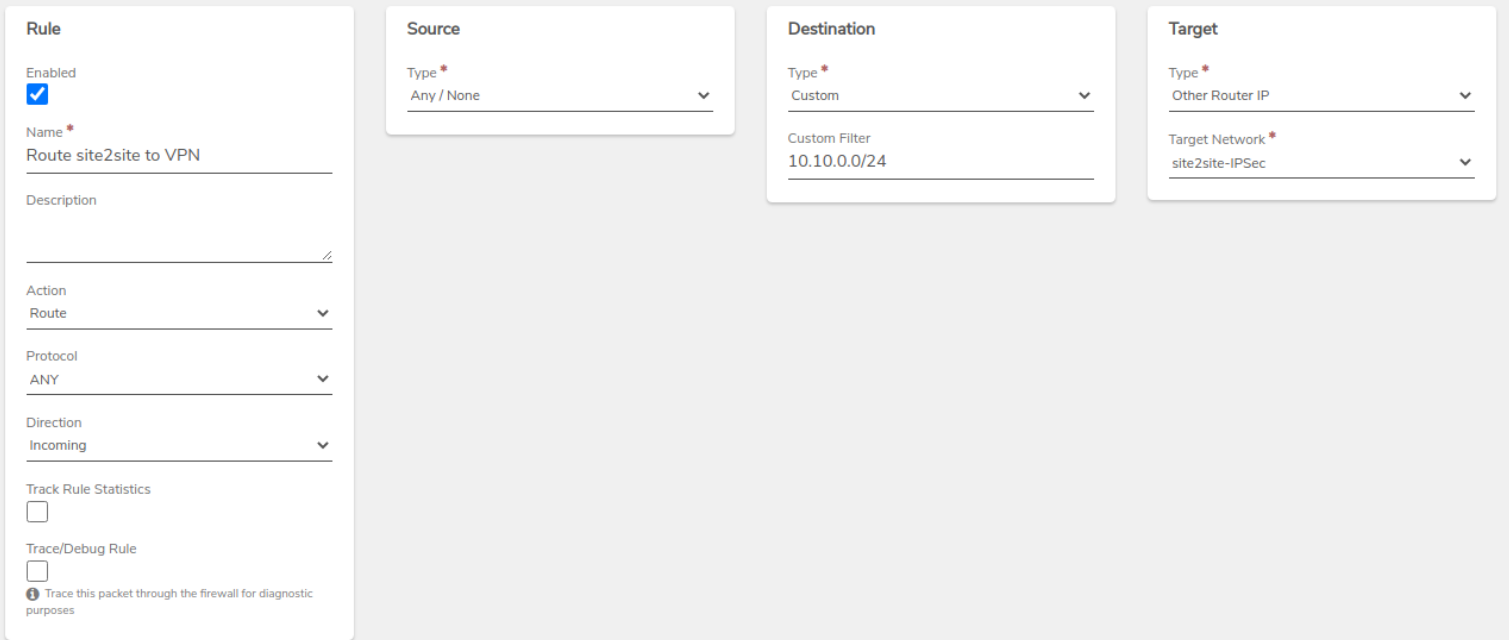
-
Create an Accept Rule on the Internal network to allow traffic from the remote network.
Connecting to IPsec#
- Open the VPN network's Dashboard (Networks > VPNs > select VPN).
- Scroll down to the IPsec Connections section.
-
Click the plug icon to connect.
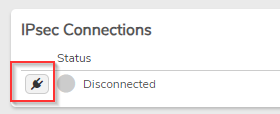
-
Watch for the IPsec status to show connected.
If the connection fails, proceed to the troubleshooting steps below.
Troubleshooting Guide#
Checking Logs and Status#
- Go to Diagnostics on the left menu.
- Change the Query to Logs and click Send.
-
Review the latest logs for errors, such as retransmission attempts.

Common Connection Issues#
If you see many retransmit messages, this could indicate connection issues, often caused by incorrect network rules or firewall setups.
- Test connectivity with Ping.
- Change the Host to the Remote Gateway IP and check for packet failures.
If pinging the Remote Gateway fails, verify that your connection is not blocked and that the correct route is in place.
Other Diagnostics#
- Ping 8.8.8.8 to test for internet connectivity. If this fails, check the Default Route rule.
- Run "What's My IP" to verify the VPN's WAN connection.
- Use TCP Connection Test to check the IKE port (port 500) on the Remote Gateway.
- Run a Trace Route to the Remote Gateway to confirm correct traffic routing.
- Use IPsec diagnostics with Status All to view the current state of the IPsec Tunnel or Show Config to review the configuration.
- Review Logs in Diagnostics, increasing the line count if necessary.
By following these steps and rules, you can successfully set up an IPsec VPN tunnel in VergeOS, troubleshoot common issues, and ensure that traffic flows properly between networks.
Document Information
- Last Updated: 2024-08-29
- vergeOS Version: 4.12.6