Cluster Recovery After Full Power Outage
Overview
Key Points
- Ungraceful shutdowns should be avoided where possible, particularly on production systems.
- This guide provides best practices -- to mitigate potential problems -- for powering on the cluster after an unexpected shutdown does occur.
- Power on Node1 first. Wait 30 seconds to a minute, then power on remaining cluster nodes.
- A non-zero Repairs count after recovery is normal; it should decrease as Journal Walks complete.
- Engage VergeIO Support when anomalies persist.
Scope
This guide covers powering a VergeOS cluster back on after an ungraceful shutdown -- where the cluster lost power abruptly due to a power outage, UPS exhaustion, facility failure, or similar event. For planned, controlled shutdown and power-on procedures, see Proper Power Sequence and Proper VergeOS System Shutdown Procedure.
Avoid Ungraceful Shutdowns Where Possible
- While VergeOS includes multiple built-in protections to preserve data integrity, no distributed storage system can fully guarantee against data corruption when nodes lose power abruptly and simultaneously.
- Writes in flight at the moment of power loss may be incomplete or inconsistent across peers, and in some cases the only path back to integrity is rolling a volume back to a recent snapshot.
- Additionally, hardware, guest OS, and application problems are common after ungraceful shutdowns.
- Proper power infrastructure -- UPS coverage sized for graceful shutdown, redundant PSUs, and automated shutdown on low-battery -- is the most effective protection; see the Prevention section for guidance.
- When an ungraceful shutdown does occur despite these precautions, the procedure that follows is designed to bring the cluster back online safely and surface any integrity issues that need attention.
Prerequisites
- Physical or IPMI/BMC access to every node
- Knowledge of which node is Node1 (boot order matters) and which two nodes are the controllers (Node1 and Node2)
- Confirmation that upstream power, networking (core fabric switches), and IPMI are restored and stable
- A recent local or remote-replicated snapshot in case integrity issues are found
- Familiarity with the vSAN Tier Dashboard / Journal Walks
Steps
What to Expect
- VergeFS includes multiple built-in protections to help preserve data integrity during power events -- including write journaling, peer replication, repair servers (ioGuardian), and on-startup verification. On controller startup, VergeFS triggers a Full Journal Walk to verify each block and reconcile against peers. These protections are effective in most cases, but no distributed storage system can fully guarantee against corruption from abrupt power loss; verification after startup is important, especially after an ungraceful shutdown.
- vSAN requires N-1 vSAN nodes online before it will mount. Until that threshold is reached, storage stays offline and VMs will not start.
- Node1 will boot but halt before mounting the vSAN until enough peers join to satisfy N-1.
- A non-zero Repairs count after recovery is normal and should decrease as the Walk progresses.
Pre-Power-On Checks
Verify Infrastructure Is Ready First
Before powering on any cluster nodes, confirm two critical conditions are met. These are covered in the prerequisites, but they bear repeating here -- skipping them can cause significantly more damage than the original shutdown:
- Facility power is fully restored and stable. Bringing the cluster up during ongoing power instability -- flickers, brownouts, or a second outage -- risks compounding the original problem and can lead to further data integrity issues.
- Core network switches are powered on and fully booted. Enterprise switches can take several minutes to complete their boot process, similar to a server. If cluster nodes come online before the network is ready, they will be unable to discover their peers, which can cause reconciliation problems.
- Confirm upstream power is stable. Bringing nodes up on an unstable feed risks a second outage mid-recovery.
- Confirm core network switches are online, fully booted, and the inter-node fabric is up. vSAN cannot reform without it, and advanced switches can take several minutes to finish booting.
- Verify IPMI/BMC access on each node so you can monitor boot remotely if needed.
- Note any nodes with visible hardware faults (failed PSUs, drive LEDs, fan alarms) -- these may need attention before being added back.
Power-On Sequence
Once power and network infrastructure are confirmed ready:
- Power on Node1.
- Watch the console/IPMI. Node1 will boot the OS but halt before mounting the vSAN until enough peers join to reach N-1. - Wait 30 seconds to a minute.
- This brief pause lets Node1 begin initializing before the rest of the cluster arrives. There is no need to wait for Node1 to fully reach its halt state before proceeding. - Power on the remaining nodes.
- The remaining nodes can be powered on together (or in close succession); there is no need to stagger them one at a time.
- The vSAN mounts automatically as soon as a minimum number of nodes are up (e.g. N-1 in a default N+1 configuration). - Multi-cluster environments: bring the controller cluster fully online before powering on additional clusters.
Pro Tip
Node1 boots first and sits waiting while you power on the rest of the cluster -- that's expected, not a stuck state. The vSAN mounts on its own as soon as enough peers are online, and VergeOS handles reconciliation automatically; no manual repair commands are needed.
Post-Recovery Verification
Once all nodes are online and the cluster has had time to settle, verify that everything returned to a healthy state. Because the cluster was shut down ungracefully, perform these checks with heightened scrutiny -- abrupt power loss can leave behind issues that the cluster cannot fully resolve on its own. Look closely for persistent vSAN errors, failed or crash-looping workloads, and any guest-level filesystem errors. If unresolvable corruption is detected, rolling a volume back to a recent snapshot may be required.
-
Confirm overall system health Abrupt power loss increases the risk of hardware problems. It is important to check for any issues:
- Review the Alarms dashboard. Confirm no new alarms have been triggered.
- Review system logs (Main Dashboard) for errors during boot or initial mount.
-
Verify vSAN health
- Open the Main Dashboard -- all status lights should be Green.
- Navigate to System → vSAN → Tiers and double-click each tier.
- Review the Status tile on each tier's dashboard. The KB article Understanding vSAN Tier Status/Journal Walks provides a guide for reading vSAN tier status fields.
-
Verify drive health
- Go to System → vSAN → Drives.
- Look for any drives showing errors, warnings, or SMART alerts -- these can occur when drives don't return cleanly after abrupt power loss.
- Replace faulty drives expediently to maintain vSAN data protection.
-
Verify workloads
VM Auto-Start Behavior
By default, VMs are configured to auto-start when power is restored to the cluster. VMs with an alternate On Power Loss setting will need to be powered on manually.
- Verify critical VMs: console responsive, guest OS healthy, application services up. Ungraceful shutdowns can cause problems within the guest OS and installed applications -- watch for filesystem errors, services that fail to start, and applications that crash on launch.
- Identify potential rollback candidates as early as possible -- ideally before applications return to heavy use.
Snapshot Rollback Decisions Are Time-Sensitive
If the overall system or individual VMs show signs of damage from the ungraceful shutdown that cannot be repaired in place, restoring from a pre-outage snapshot may be the only path back to a healthy state. This determination should be made as promptly as possible, for two reasons:
- Snapshot retention is finite. A viable pre-outage snapshot may roll off and become unavailable if too much time passes before the decision is made.
- Newer data is lost on rollback. The longer the affected VM stays in production use after the outage, the more legitimate post-recovery work is discarded when the rollback is performed.
Troubleshooting
Common Issues
- Problem: A node fails to rejoin the cluster.
-
Solution: Check IPMI/console output for boot errors. Verify the node's core network interface is up and reachable from peers. Review System → Nodes → [node] for status and last-seen timestamps. If the node boots but does not join, do not force-remove it -- contact support.
-
Problem: vSAN won't mount / storage offline.
-
Solution: Confirm N-1 vSAN nodes are Online under System → Nodes (e.g., 3 of 4 in a 4-node cluster, 5 of 6 in a 6-node cluster). Confirm inter-node connectivity (core fabric switches, link state, MTU). If the threshold is met but storage still won't mount, capture a sysdiag and engage support.
-
Problem: Repair count is stuck or growing.
-
Solution: A small, decreasing Repairs count is normal post-recovery. A count that stops decreasing or grows indicates blocks vSAN cannot reconstruct from peers. Do not reboot any nodes. Engage support before taking remediation steps.
-
Problem: Suspected split-brain or inconsistent cluster state.
- Solution: During recovery a network problem can cause two subsets of nodes to come up unable to see each other. If you see signs of two independent clusters forming (rare, but possible after partial network restoration), do not attempt to merge them yourself. Capture sysdiags from every node and engage support immediately.
Prevention/Mitigation
- UPS sizing and coverage -- size the UPS to cover graceful shutdown duration plus margin for every node. Include core network switches in the same coverage. Test UPS runtime annually -- batteries degrade.
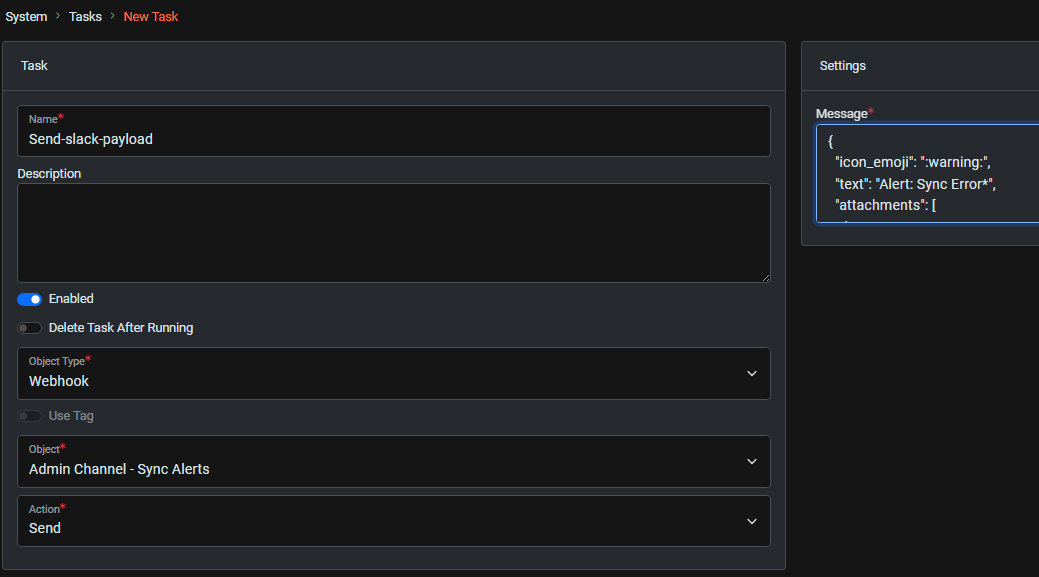
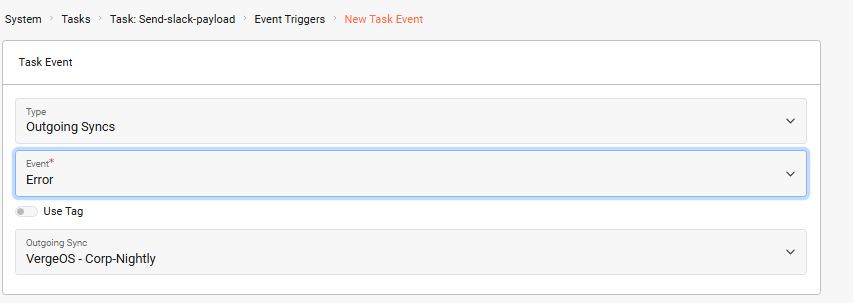
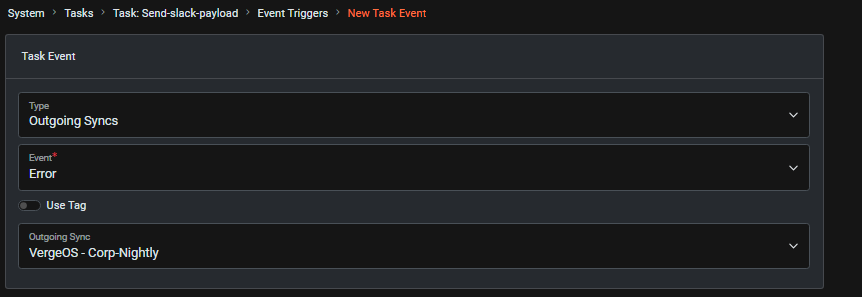
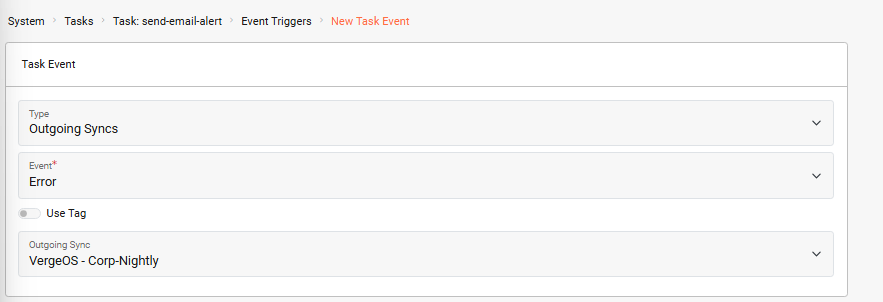
- Automated graceful shutdown -- Use UPS management software (NUT, IPMI scripting, or your UPS vendor's agent on a management host) to detect a low-battery event and trigger a graceful cluster shutdown -- either via the Cluster Dashboard's Power Off action, the VergeOS API (
POST /v4/cluster_actionswith body{"cluster": <cluster_id>, "action": "shutdown", "params": "{}"}), or our VRG CLI wrapper, which can script the same shutdown call from a Linux/macOS/Windows host. Validate the automation in a maintenance window before relying on it. - "On Power Loss" VM settings -- configure each VM's behavior deliberately so post-recovery state is predictable. Three options:
- Last State -- VM powers on only if it was on at the time of power loss
- Leave Off -- VM stays off when power is restored, regardless of prior state
- Power On -- VM powers on when power is restored, regardless of prior state
- Repair server (ioGuardian) -- a configured repair server gives VergeFS a fallback source for missing blocks if peer nodes can't supply them after an outage. It pulls needed blocks from a synchronized remote VergeOS system and is built from an existing outgoing site sync configuration. Repair servers are strongly recommended for any production deployment.
- Adequate snapshot rotation -- maintain a snapshot retention schedule that keeps recent, pre-event snapshots available for rollback when needed. Replicating snapshots to a remote site is also recommended as part of a comprehensive data protection strategy.
When to Engage Support
Open a support case before rebooting nodes, or making any other significant changes, if any of the following are true:
- vSAN won't mount after N nodes are online (e.g. N-1 nodes in a default N+1 redundancy)
- A tier shows Redundant: false for an extended period after Full Walks complete
- The Repairs count is stuck or growing
- A stuck-repairs alert is present (VergeOS v26+)
- Multiple drives report errors after recovery
- You suspect split-brain or inconsistent cluster state
- Any node fails to rejoin and the cause isn't obviously hardware
Generating a System Diagnostic for Support
Before opening the case, capture a sysdiag and attach it (or send it directly to support):
See Generating System Diagnostics and the full System Diagnostics reference.
Additional Resources
- Proper Power Sequence
- Proper VergeOS System Shutdown Procedure
- Understanding Journal Walks and vSAN Tier Status
- Generating System Diagnostics
- Repair Server (ioGuardian)
- vSAN Diagnostics Guide
Feedback
Need Help?
If you need further assistance or have any questions about this article, please don't hesitate to reach out to our support team.
Document Information
- Last Updated: 2026-05-08
- vergeOS Version: 26.0+