Bypassing TPM Requirements in Windows 11
How to Bypass Windows 11's TPM Requirement Using the Registry Editor during the installation#
This only applies to versions of VergeOS previous to 4.11 (Atria).
If you have the Windows 11 install disk or ISO, you can bypass the Windows TPM and RAM requirements by making registry changes during the install.
This method only works on a clean install and does not allow you to bypass the requirement for at least a dual-core CPU.
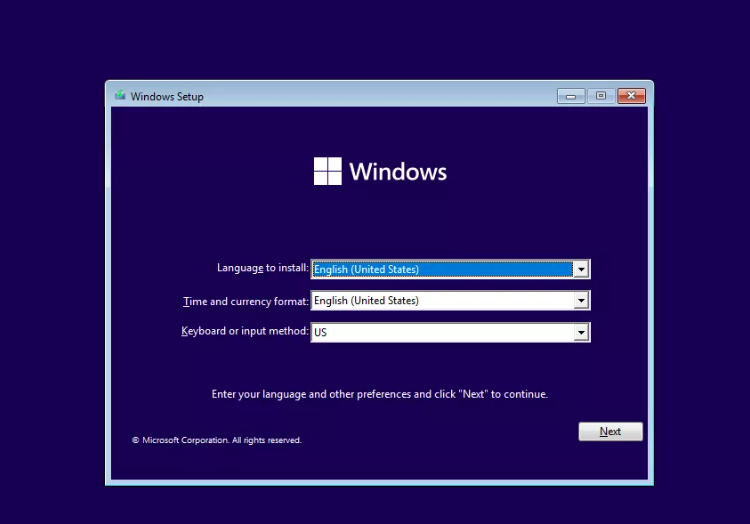
- Boot off of your Windows 11 install disk. If you don't have one, one can be downloaded from here. The first screen should ask you to choose the language of your install (which should be correct).
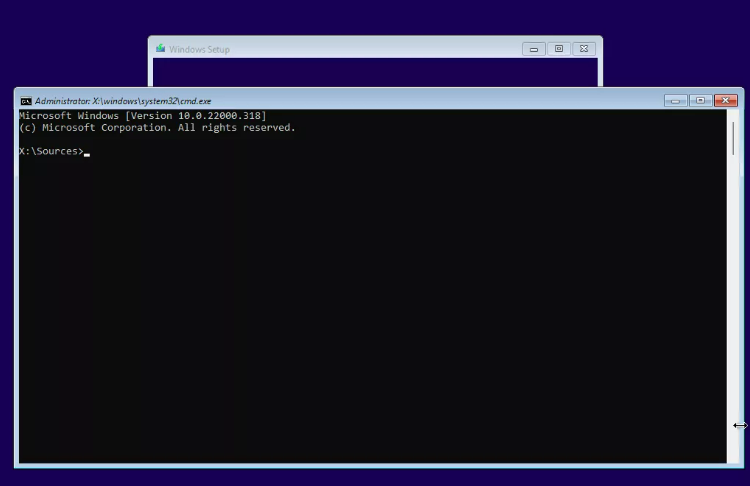
- Press SHIFT + F10 to launch the command prompt.
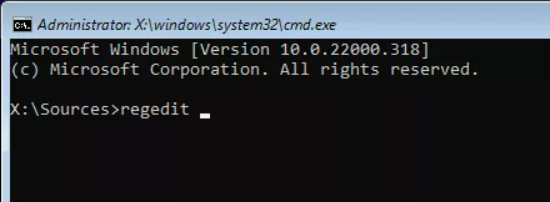
- Type regedit and hit Enter to launch registry editor.
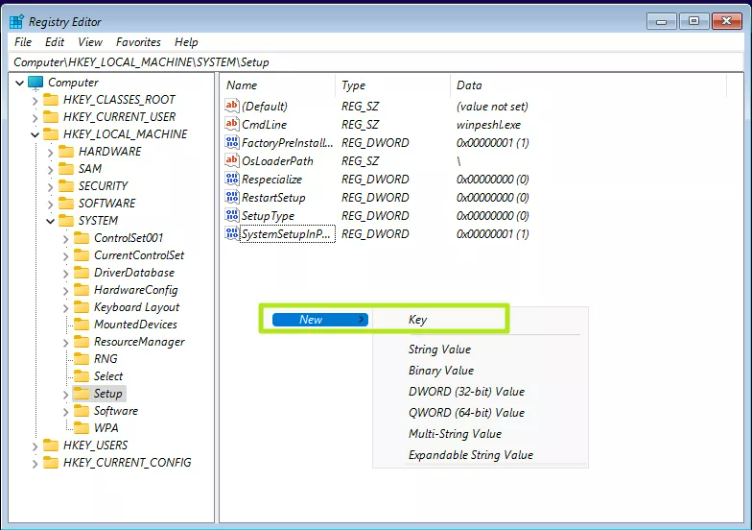
- Navigate to HKEY_LOCAL_MACHINE\SYSTEM\Setup.
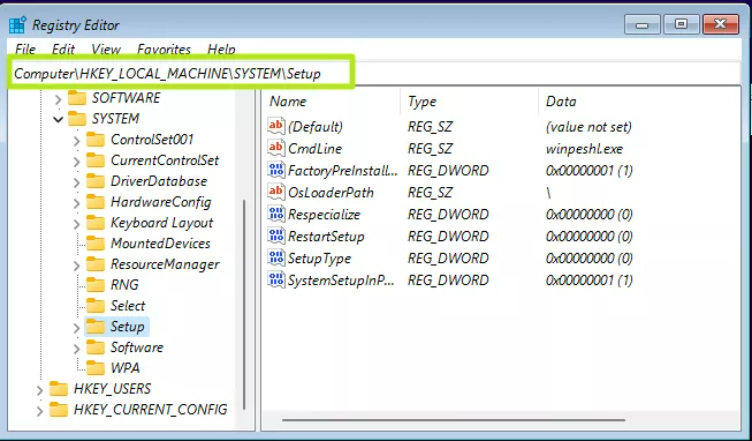
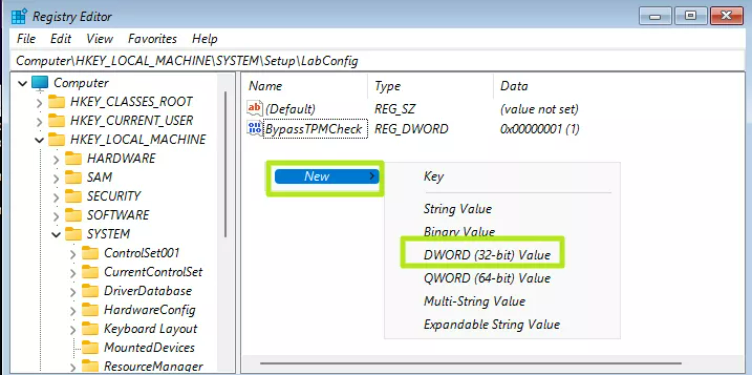
- Create a new registry key under Setup and name it LabConfig. To create a registry key, right click in the right window pane and select New->Key. Then enter the key name.
- Within LabConfig, create 2 new DWORD values called BypassTPMCheck and BypassSecureBoot and set each to 1. To create a new DWORD value, right click in the right window and select new DWORD (32-bit) Value then name the key, double-click to open it and set it to 1.
If you also want to bypass the RAM requirement, add a DWORD values for BypassRAMCheck.
- Close regedit and exit the command prompt. You can now continue with your Windows 11 installation as normal.
Document Information
- Last Updated: 2024-08-29
- vergeOS Version: 4.11